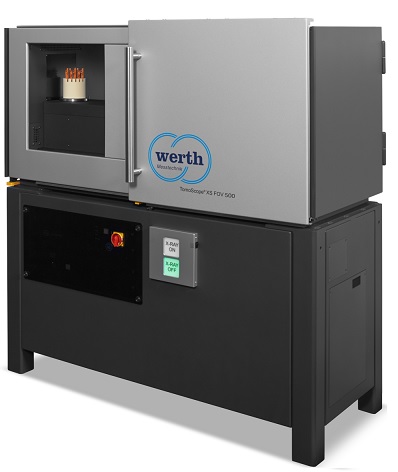
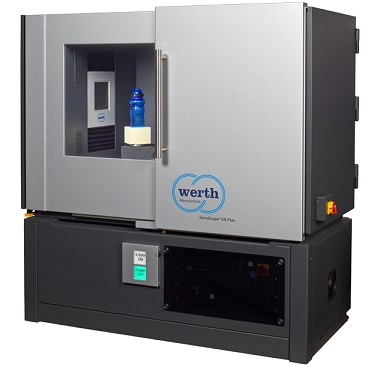
TomoScope® XS CT Scanner for multi material parts (plastic / metal combination)

TomoScope® XS CT Scanner ideal for Shop Floor, Gage and Quality Laboratory.

call 866-945-5742 or email [email protected] for more info

Read More

Features

  • Coordinate measuring machine for three-dimensional measurement utilizing computed tomography
  • Fast measurement with high resolution via the next generation transmission tube
  • Reduce measurement time by 90% with OnTheFly Technology
  • Low operating costs as a result of the new monoblock design
  • Extremely precise air bearing rotary axis for low measurement uncertainty
  • Low space requirement thanks to compact design
  • Low weight allows for installation almost anywhere
  • Fast amortization through low acquisition costs
  • Standard-compliant calibration for reliable and traceable measurement results, optionally with DAkkS certificate
  • Versatile fields of application such as plastic, metal and multi-material components
  • Software for 3D real-time reconstruction of workpiece geometries during tomograp

Machine Specification

  • X-ray source
    • 130/160 kV Micro Focus X-ray Sources with up to 80W Target Power
  • Measuring Range
    • From L=49mm (1.9) Ø=55 mm(2.2) (in the image)
    • To  L=97mm (3.8”³) Ø=120 mm(4.7) (in the image)
    • Max. Distance X-ray Source Detector: FDD=500mm (19.7”³)
  • Foot Print
    • Depth: 583 (22.9”³) Width: 1300 mm (51.2) Height: 1370mm (53.9)
    • Machine Weight: 600kg (1,323 lbs.)
  • Maximum Permissable Error MPE
    • Application and Material Dependent

Werth TomoScope XS Line

COMPUTER TOMOGRAPHY – PRECISE MEASUREMENT WITH COMPUTER TOMOGRAPHY-1

Tomoscope ct scanner

To be able to measure the shape and position of a measured object with sufficient precision, it is necessary to correct systematic errors in tomography. Several process-related effects lead to these systematic deviations. Common to all of them is the dependence on various parameters, such as cathode voltage of the X-ray tubes, the radiation spectrum that depends on it, as well as material and geometry of the measured object itself.

An example of this is beam hardening. This effect can be traced to the fact that the radiation spectrum of an X-ray tube is made up of various frequencies. Due to their higher energy, high-frequency radiation components are absorbed by the irradiated material at a lower proportion than the low-frequency ones. As shown in Figure 41, this has the effect that for a large material thickness, low-energy sections of the X-ray spectrum can even be completely absorbed, and thus only high-energy radiation impinges on the detector. Since the mathematical algorithm for 3-D reconstruction is based on the thickness dependent absorption of the entire X-ray spectrum, material areas with large radiographic length will systematically be measured as too large. This effect is known as a beam hardening artifact.

HIGH CYCLE SPEEDS WITH ONTHEFLY CT

Measurement

One benefit of computed tomography is that the workpiece is captured completely, including undercuts and internal geometries. Historically, computed tomography has been too slow for measurements during the manufacturing process.

For years, real-time reconstruction in WinWerth® in parallel with image capture has been used to minimize measurement time. To move beyond this, several methods have been introduced, each with its drawback. For instance, the power level of the X-ray tubes may be increased, but this comes at a cost of lower resolution due to the larger focal spot. The exposure time can also be decreased by reducing the distance between the X-Ray source and the detector. However, doing this will increase the severity of cone beam artifacts. Directly reducing only the exposure time means that the dynamic range of the detector will not be fully utilized. Finally, it is possible to improve measurement time for a multicavity measurement, by measuring several workpieces simultaneously. This can be done because the point clouds are separated automatically. This method, however, generally limits the magnification, reducing the resolution for each individual part.

The new OnTheFly CT (patent pending) saves time lag due to start-stop positioning of the workpiece by continuously rotating the machine axis. In conventional start-stop operation, the rotary motion is interrupted in order to capture each radiographic image, so that no motion blur occurs under continuous exposure. For OnTheFly CT, short exposure times are needed in order to minimize motion blur. To achieve the same measurement uncertainty as in start-stop operation, the number of rotary increments is increased. The specification according to VDI/VDE is not affected, despite the greatly accelerated measurement process; ensuring traceability of the measurement results with OnTheFly CT is maintained.

With the new OnTheFly process, measurement time can be reduced by up to ten times for the same quality of data. The workpiece volume is reconstructed in real time and is available immediately after measurement. Alternatively, the data quality may be increased for the same measurement time. Methods such as raster and ROI (Region of Interest) tomography or higher detector resolution produce workpiece volumes of higher resolution with a better signal-to-noise ratio. The increased measurement time traditionally associated with these methods can be avoided with OnTheFly CT. The new technology opens up further areas of application for computed tomography that have strict measurement time requirements for a given data qualit


help desk software