Machinists are asked to do more and more as part of their daily tasks, and it seems like metrology or surface finish is increasingly a part of this

thumbnail-3

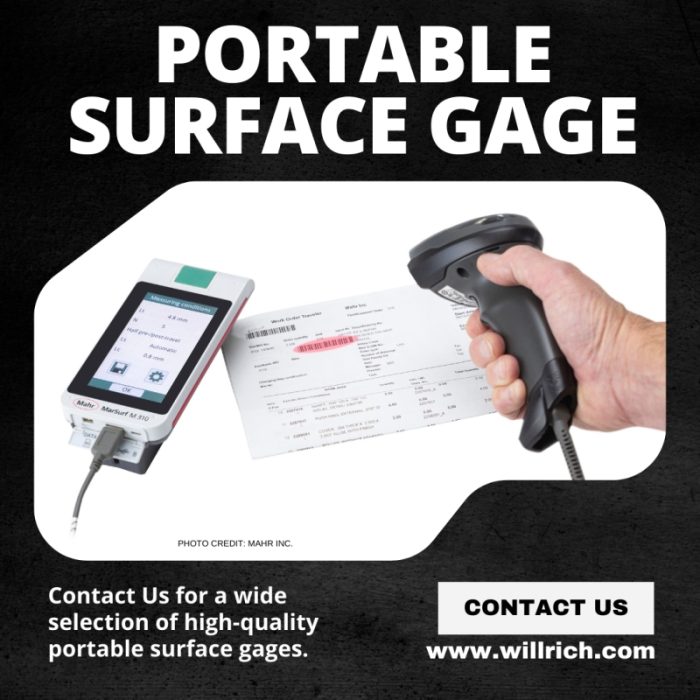
Modern Machine Shop’s latest article about portable surface gages covers the usefulness of using portable surface gages with smartphone applications. Read more about it here: https://www.mmsonline.com/articles/calling-home-on-a-portable-surface-gage

Find a wide selection of high-quality portable surface gages at: https://willrich.com/shop/surface-roughness-form-measurement/surface-rougness-testers/  for a free demonstration of our products, contact us at ➡️ https://willrich.com/about/

Air gaging is advancing faster than ever before

thumbnail-2

Air gaging is advancing faster than ever before.

Take a look at Quality Magazine’s insightful article that dives into the innovation of air gaging in various industries. Read more: https://www.qualitymag.com/articles/97466-air-gaging-moving-forward-faster-than-you-think

Curious to see how we can help your team? Watch Videos: https://willrich.com/video-category/air-gages/

Is your team looking to enhance measurement processes? Stay ahead of the curve and visit us at:https://willrich.com/?utm_source=socialmedia&utm_medium=post&utm_campaign=quartzdigitalmarketing

Know your height gages for efficient and accurate measurements

thumbnail-1

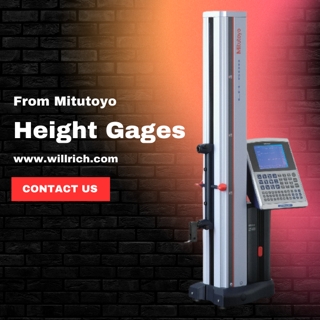
“Know your height gages for efficient and accurate measurements.”

Mitutoyo’s latest article provides a comprehensive guide, covering everything you need to know about height gages. From basic functions to advanced applications, this resource will boost your measurement expertise.

Contact us today: https://willrich.com/?utm_source=socialmedia&utm_medium=post&utm_campaign=quartzdigitalmarketing for more insights and quality measurement equipment.

Read Article: https://www.mitutoyo.com/article/ins-and-outs-of-height-gages/

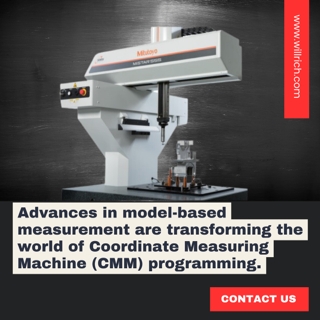
Improvements in CMM equipment and developments in model-based software solutions have also helped make the technology more accessible to more companies

thumbnail (7)

“Improvements in CMM equipment and developments in model-based software solutions have also helped make the technology more accessible to more companies.” 

Read the blog from Mitutoyo: ‘Advances In Model-based Measurement Can Reduce CMM Programming Time’ to learn about the new technology and how it reduces programming time while enhancing efficiency in quality control processes.

Ready to start? Contact us at: https://willrich.com/contact-us/?utm_source=socialmedia&utm_medium=post&utm_campaign=quartzdigitalmarketing

Read more: https://www.mitutoyo.com/article/advances-in-model-based-measurement-can-reduce-cmm-programming-time/

What You Need To Know About Height Gages

Height gages play an important role in precision measurement and quality control across numerous industries. As their name suggests, these instruments are designed to measure the height of workpieces accurately. A height gage consists of a slider with a measuring stylus that moves along a single vertical axis, perpendicular to a reference plane on the instrument base. This instrument provides precise height measurements relative to a chosen plane.

Measuring on Granite Surface Plate

Height gages are often used on granite surface plates. Here, they are used to measure and scribe part features from a reference plane. The accuracy and reliability of height gages make them invaluable tools for quality control. These instruments are often paired with accessories like the following to locate and measure specific features of a workpiece:

  • Touch probes
  • Scribers
  • Test indicators or CMM-style probes

Types of Height Gages

There are a number of height gages available. Each caters to different measurement needs and budget constraints. Two main categories are mechanical height gages and electronic height gages. They each have their subtypes.

Mechanical Height Gages

Mechanical height gages have been a staple in the industry for years. They come in three basic forms:

  • Vernier Height Gages: These are available in a wide range of heights – from 6 inches to 6 feet. Their versatility and use of both inch and metric scales on the beam make them a popular choice.
  • Dial Height Gages: Good for smaller measurements, dial height gages are generally available in sizes below 12 inches or 300 mm. They are easier to read than Vernier height gages. They’re also compact, so they’re convenient for personal use.
  • Digital Counter Height Gages: Equipped with a dial and dual-digit counters, these gages simplify the measurement process. The digital display is more user-friendly than Vernier scales. The dual counters allow for easy reference datum setting.

Electronic Height Gages

Electronic height gages are divided into three groups according to their features and accuracy:

  • Basic Electronic Height Gages: Comparable to mechanical gages where accuracy is concerned, these offer features like absolute zero, inch/metric conversion, floating zero, and data output.
  • Advanced Electronic Height Gages: This group improves on the previous one with better accuracy. Additional features can include ID/OD measurement, max/min, tolerance settings, TIR measurement, and probe compensation.
  • High-Accuracy Electronic Height Gages: This is the most advanced category. These gages boast the features of the previously stated groups but with even higher accuracy. Air bearings, motorized touch probes, part program generation, and computer interfaces for SPC are common in this class.

Taking Precise Measurements

Most height gages come with a scriber for locating the top of a workpiece. But, for better accuracy, a test indicator (or high-accuracy probe) can be used. Digital height gages provide the benefit of touch probes that help automate zero detection and distance measurements.

Using Digital Displays and Additional Features

Digital displays on height gages have a number of advantages. 

  • They are easier to read
  • Allow quick unit and resolution switches
  • Offer flexible zero-setting options
  • Can interface with electronic data collectors

This digital interface improves the measurement process and minimizes human error.

Advanced Functionality for Distance Between Centers

Traditional height gages had trouble with measuring distances between centers. But advancements have introduced height gages with calculation capabilities. These gages can memorize peaks and valleys within a sweep. This greatly aids measurements like center-to-center distances.

Maintenance and Accuracy

Regular maintenance is important for accurate measurements. The base, granite surface, and column(s) of the height gage should be kept clean and free from burrs or scratches. Proper maintenance helps guarantee the longevity and precision of these tools.

Height gages are invaluable instruments for accurate height measurements and quality control. With so many types available – from mechanical to advanced electronic gages – industries can choose the right tool for their needs. Regular maintenance and proper use techniques are critical for assuring consistent and reliable measurements.

Experience The Tailored Expertise of Willrich Precision Instruments! 

Discover a range of personalized gaging solutions – spanning from comprehensive design and build services to functional fit gages – along with cutting-edge metrology automation cells and easy shop floor metrology integration. Whether you require a standardized gaging solution or a multifaceted turnkey approach, allow Willrich Precision Instruments to assist you in meeting your simplest or most intricate measurement requirements. Our dedicated team does in-depth research and assessment of various products in the market to provide our clients with the ultimate premium solution for each unique application. Connect with Willrich Precision Instruments now at 866-945-5742 or reach out via email at [email protected].

Can Model-Based Measurements Help Improve CMM Programming Processes?

In today’s rapidly changing manufacturing landscape, the demand for efficiency and precision in measurement processes has led to the creation and use of model-based measurements. This shift has been driven by things like the increasing emphasis on quality control, the diversification of the parts and components being measured, the complexity of global supply chains, and shortened product lifecycles. As the industry moves from traditional 2D drawings to more advanced 3D annotated models, an important question arises: “Can model-based measurements truly revolutionize CMM (Coordinate Measuring Machine) programming processes and bring about substantial improvements?”

The Rise of Model-Based Measurements

Model-based measurements involve a novel approach that leverages 3D CAD (Computer-Aided Design) models and Product Manufacturing Information (PMI) to automate the generation of measurement programs. This transformation works by offering the following: 

  • Simplifying programming complexities
  • Reducing human error
  • Significantly cutting down programming time

Unlike the conventional method – where manual programming could consume hours – the creation of automatic measurement program generation software has reduced these tasks down to mere minutes.

Industry Catalysts for Change

The aerospace and defense sectors have emerged as pioneers in adopting model-based measurements. Industry giants like Boeing, Lockheed, Raytheon, Ford, and Deere – alongside branches of the U.S. military – advocated for the integration of automatic measurement program generation software as part of their digital product definition strategies. This has prompted some original equipment manufacturers in the Department of Defense supply chain to embrace model-based definitions (MBDs). This further validates the potential of this approach.

Understanding Model-Based Definition (MBD)

Model-based definition involves employing 3D annotated models and associated data elements to define a product; clearly, a far cry from traditional drawings. While MBDs have been employed in product definition, they’re now being used for quality assurance purposes. This presents a more efficient way to compare CMM results with CAD models. This is particularly the case in industries like commercial aerospace, defense, and even the medical device market.

Benefits Involving Efficiency and Precision

The transition to MBD provides several tangible benefits to manufacturers seeking to simplify their measurement processes:

  • Easier Processes: MBD eliminates the need for a convoluted 3D-to-2D-to-3D workflow. It simplifies the process to direct 3D CAD-to-3D CNC CMM programming. This leads to major reductions in programming time.
  • Reduced Manufacturing Costs: The investment in automatic measurement program generation software is offset by the increase in productivity. The time savings can be as high as 95% (compared to traditional drawing-based methods).
  • Improved Traceability: The direct read of metadata, features, and characteristics from the CAD model lessens the risk of misinterpretation (which could occur if relying on drawings).
  • Optimization and Flexibility: MBD provides quick changes to plan parameters and CMM configurations. This facilitates adaptability to changing needs.
  • Workflow Automation: Some projects have already achieved full automation. Machines communicate flawlessly, while human oversight assures optimal performance.
  • Improved Productivity: Automation reduces the burden of low-level programming tasks on CMM planners. This allows them to focus on higher-value activities.

Mechanics of Automatic Measurement Program Generation Software

The core of automatic measurement program generation software is in its ability to sidestep traditional drawing-based methods. It directly generates and executes a model-based workflow. The process involves importing an MBD, applying rules that align with the configured CMM, and automatically generating a part program. Optimizations refine the program to minimize probe changes and path length. This helps to guarantee efficiency and precision.

Selecting the Right Metrology Software

When thinking about metrology software to support model-based quality control, several key considerations deserve your attention:

  • Cost Efficiency: Despite the initial investment, the gains in programming productivity and just-in-time program generation can offset the costs.
  • CAD Compatibility: Software should easily read, organize, and work with CAD models.
  • Global Collaboration: The ability to work across various locations globally and share measurement plans and configurations is important.
  • Training and Support: Look for software that provides effective training with a shorter learning curve for model-based measurements.
  • Customizable Reporting: The software should allow customization to generate complete reports or focus on specific features.
  • Versatility with CMM Systems: Compatibility with coordinate measurement systems provides flexibility and adaptability.

Embracing the Future of Measurement Programming

The integration of model-based measurements holds the potential to revolutionize CMM programming processes. This approach not only eases workflows, reduces costs, and improves traceability but also opens the door to a new era of automation and efficiency. As industries recognize these advantages, the adoption of model-based measurements is poised to become a cornerstone of modern manufacturing.

Discover Willrich Precision Instruments – A Tailored Precision Solution

Our Willrich Precision Instruments range encompasses personalized gaging answers, spanning functional fit gauges, meticulous design and construction, automated metrology cells, and seamless shop floor metrology fusion. Our adeptness extends from fundamental measurement requirements to intricate challenges. Trust us with your needs – whether conventional or intricate – and allow our dedicated team to explore and evaluate various product options, guaranteeing optimal resolutions for every scenario. Reach out to Willrich Precision Instruments now at 866-945-5742 or drop us an email at [email protected].

What Are The Uses Of Ceramic Ring Gages?

Ceramic ring gages are important measuring tools used in different industries. They are accurate, long-lasting, and can resist wear and corrosion. These gages are made of advanced ceramic materials, like zirconia or alumina. They work better than metal gages and are great for precise and reliable measurements. We’ll talk more about ceramic ring gages in this article, explain what they are, their unique properties, and which industries use them.

Understanding Ceramic Ring Gages

Ceramic ring gages are tools for measuring cylindrical parts like shafts or pins. They help ensure the dimensions of external features are correct. They check if measuring devices are correct and make sure parts meet exact standards. Ceramic materials in ring gages have benefits compared to metal gages. They resist wear more, and stay stable in size and temperature. Ceramic ring gauges work well in industries like automotive, aerospace, and manufacturing. They give precise and steady measurements that are important in keeping product quality and process efficiency.

  • Calibration and Verification

Ceramic ring gages are mainly used to check and confirm measuring tools. These tools are used to check if devices like micrometers, calipers, and CMMs are accurate. Technicians and engineers use them as reference standards. Users can check if their measuring device is accurate and calibrated by comparing its measurements to the known dimensions of a ceramic ring gage.

Ceramic ring gages work great for calibration since they stay the same size and do not wear easily. They stay the same shape and size when temperatures and humidity change. This makes them good for calibration.

A ceramic ring gage size 0.8000 inch Class XX Ceramic Master ID Gage Ring, 5mm in length is often used to calibrate certain Keyence video measuring machines.  These rings can be purchased thru Willrich.com

  • Dimensional Inspection

Ceramic ring gages are used to check the dimensions of manufactured parts. They help ensure the parts are the right size. This checks the size of round things like shafts, pins, and bushings. It makes sure they fit the right measurements for use in machines and other things.

Ceramic ring gages are great for this purpose because they are accurate and last a long time. This makes them a reliable option for consistent measurements. They can be used in different environments due to their resistance to corrosion. For example, they can be used in places with high humidity or corrosive materials.

  • Quality Control and Process Monitoring

Ceramic ring gages are critical for quality control and process monitoring. They make sure that parts and components meet quality standards. Manufacturers can maintain product quality by checking part dimensions with ceramic ring gages, which help identify any deviations from specified tolerances. Then, necessary adjustments can be made to their processes regularly.

Ceramic ring gages are durable and reliable. They are great for quality control and process monitoring. They can withstand frequent use and tough conditions.

  • Thread and Spline Inspection

Ceramic ring gages can check threaded and splined parts to make sure they meet the right size and can be used in assemblies. This application uses a ring gage that has internal threads or splines. They match the outer features of the part that needs to be checked. Users can check thread or spline tolerances by putting the component in the ring gauge. This ensures proper function when parts mate.

Ceramic ring gages are great for this job. They last a long time and stay accurate, even in tough environments.

The Pros And Cons Of Steel & Ceramic Gages For Calibration

Calibration is very important for many industries. It helps measuring instruments and devices be accurate and consistent. Gages are important tools used for measuring size, shape, and angles. They set a standard for calibration.

Technicians and engineers use them to check if measuring instruments are accurate. This helps maintain the quality and reliability of their measurements. Steel and ceramic gauges are often used for calibration. Each material has unique properties that can impact the gauges’ performance and lifespan. Each has its own advantages and disadvantages which make them popular options.

We will talk about the good and bad points of using steel and ceramic gages for calibration. You can make a smart choice based on what you need to measure and your working conditions.

Advantages of Steel Gages

Steel gages offer several benefits for calibration applications, including:

  • Durability: Hardened steel gauges are tough and can handle heavy use in industrial settings. They are a good option for areas where the gages may face a lot of damage.
  • Affordability: Steel gages are cheaper than ceramic ones. Businesses prefer them to minimize their costs. The cost advantage can be big when buying lots of gages or replacing old or broken ones.
  • Versatility: Steel gages come in many sizes, shapes, and types, so they can be used for different calibration jobs. Users can choose the best gage for their measurements because of its versatility.

Disadvantages of Steel Gages

Despite their benefits, steel gages also have some drawbacks, such as:

  • Susceptibility to Wear: Steel gauges are tough, but they may wear out if used often with rough materials or frequently. Wearing can cause the gage to change size, which affects calibration accuracy.
  • Corrosion: Steel gages can be prone to corrosion, especially in humid or corrosive environments. Corrosion can cause problems with calibration by changing the size and surface. This can make it less accurate and reliable.
  • Thermal Expansion: Steel gages may be affected by temperature changes. They can expand or contract, which changes their dimensions. The accuracy of calibration can be affected by sensitivity, especially in places where the temperature varies a lot.

Advantages of Ceramic Gages

Ceramic gages offer several benefits for calibration applications, including:

  • Wear Resistance: Ceramic gauges are very durable, so they’re good for rough or frequent use. This can mean that the item lasts longer and gives more accurate results.
  • Dimensional Stability: Ceramic materials keep their shape and size despite temperature and humidity changes. Ceramic gages are very stable, which makes them good for calibrating things even in places where conditions change.
  • Corrosion Resistance: Ceramic gages don’t corrode easily. They are good for places that are humid or corrosive. Steel gages might rust in these places.
  • Non-Magnetic and Non-Conductive: Ceramic gages are perfect for calibration in places where electrical or magnetic problems could be an issue. They are non-magnetic and non-conductive.

Disadvantages of Ceramic Gages

Despite their advantages, ceramic gages also have some drawbacks, such as:

  • Cost: Ceramic gages cost more than steel gages. This may matter to companies who want to save money on equipment.
  • Fragility: Ceramic materials are strong and wear-resistant. However, they are more likely to chip or crack than steel if mishandled or dropped due to being brittle.
  • Limited Availability: Ceramic gages may be harder to find than steel gages, especially in unique sizes or styles. It can be harder to get new gages or find ones for specific jobs when they aren’t easy to come by.

Ring Gages 101: What They Are, Types & How To Use

Ring gages are important tools in many industries. They help ensure the accuracy and precision of manufactured items. Cylinder-shaped measuring tools are important for quality control, calibration, and inspection. They help check the size of parts and keep product quality high for technicians and engineers. This article will explain ring gages, the different types and how to use them in various applications.

What are Ring gages

Ring gages are tools used to measure the size of cylindrical parts like shafts and pins. Parts are checked to ensure they fit and work properly in assemblies and other uses. Ring gauges come in different materials like steel, ceramic, and tungsten carbide. Each material has its advantages and disadvantages depending on how it is used.

Gauges are important in many industries like cars, airplanes, and factories. They help keep things precise and efficient for good quality products. Understanding the various ring gauges and using them correctly can guarantee precise and reliable measurements, leading to consistent high-quality standards in all your operations.

Types of Ring Gages

Ring gages come in different types, each for a specific use in measuring. These include:

  • Plain Ring Gages: Plain ring gages check the size of cylindrical parts. They’re also called cylindrical ring gages or go/no-go gages. These gages have a smooth, round hole and help determine if a part is within the allowed limits. A “go” gage checks the smallest size, while a “no-go” gage checks the biggest size. Technicians can use go and no-go gages to check if a part meets the required tolerances quickly.
  • Threaded Ring Gages: Threaded ring gages are tools to check the threads on screws, bolts, and threaded rods. These gages have the same threads as the part being checked. This lets users check if the threads fit the requirements. Threaded ring gages come in go and no-go types. They let you measure the smallest and largest acceptable thread sizes.
  • Spline Ring Gages: Spline ring gauges check the splines on gears, shafts, and couplings. These gages have splines that match the part being inspected. This helps check that the splines are within the required limits. Spline ring gages come in go and no-go options, like threaded ring gages. They let users check the smallest and largest possible spline dimensions.
  • Adjustable Ring Gages: Adjustable ring gages are handy measuring tools. They can be adjusted to fit a variety of part sizes and tolerances. They are very versatile. These gages can be adjusted by turning the thread to fit the part being inspected. Adjustable ring gages are helpful when inspecting parts with different dimensions. They replace the need for many fixed-size gages.

How To Use Ring Gages

To use ring gages well, you need to know the right techniques and best practices. Here are some key steps to follow when using ring gages:

  • Select the appropriate gage type and size: Choose the appropriate ring gage for your measurement task and the part being inspected. You may need to choose between a plain, threaded, spline, or adjustable gauge. Make sure the gage size is the same as part dimensions and tolerances specified.
  • Clean the gage and part: Check that both the part and the gage are clean before using a ring gage. Dirt can mess up the measurements.
  • Insert the part into the gage:  For plain ring gages, insert the part into the gage, ensuring that it is properly aligned with the bore. To use threaded or spline ring gages: 1. Place the gage on the part. 2. Make sure the threads or splines on the part and gage are aligned. 3. Rotate the part to ensure proper
  • Check for proper fit:  For go gages, the part should fit smoothly and easily into the gage without excessive force. For no-go gages, the part should not fit or should only partially engage with the gage. If the part fits both go and no-go gages, it is considered out of tolerance and may need to be reworked or rejected.
  • Record the results:  Record the inspection findings. Mention if the part meets the required standard or needs additional attention.

How To Use A Ceramic Pin Gauge

Ceramic pin gauges are important tools used in many industries. They are precise, long-lasting, and used for measuring the size of holes and the distances between them. These gauges are made from strong ceramic materials. They withstand wear, corrosion, and temperature changes. This makes them perfect for tough environments. We will talk about using a ceramic pin gauge. It is a useful measuring tool with many benefits. We will also share practical tips to ensure accurate measurements.

Ceramic pin gauges are precise measuring tools. They are used to measure the size of holes, slots, and other inside parts accurately. Industries like automotive, aerospace, and manufacturing often use them to make precise measurements. This is important for keeping product quality and process efficiency in check.

Using ceramic pin gauges improves measurement accuracy and reliability. They are more durable, and less affected by changes in temperature, deformation, and wear. They can be used in areas with electrical or magnetic issues because they don’t conduct electricity or magnetism. Using a ceramic pin gauge requires knowing how to handle, insert, and read it properly. Accuracy can be affected by other factors too. In fact, ceramic pin gages in below sizes are often used to calibrate a Keyence video measurement system.  Often customers buy .100” class xx ceramic master pins and .8000” class xx ceramic master pins from Willrich Precision to calibrate specific types of Keyence systems

Handling and Preparing the Ceramic Pin Gauge

To get accurate measurements, prepare and handle a ceramic pin gauge correctly. Follow these steps to prepare your ceramic pin gauge for use:

  • Inspect the gauge: Make sure the gauge is not damaged before checking it. Look for chips or cracks because they can alter the measurements. If any damage is detected, do not use the gauge and replace it with a new one.
  • Clean the gauge: Remove any dirt, grease, or debris from the gauge using a clean, lint-free cloth or compressed air. Contaminants on the gauge are bad. They can make measurements wrong and hurt the gauge or the thing being measured.
  • Verify the gauge size: Ensure that the gauge is the correct size for the measurement you need to perform. Ceramic pin gauges come in different sizes, usually from 0.5mm to 20mm in diameter. The gauge size should be clearly marked on the gauge itself or on its storage case.

Inserting the Ceramic Pin Gauge

If you want to accurately measure a hole or feature, follow these guidelines when inserting the ceramic pin gauge.

  • Align the gauge: To measure a hole or feature, make sure the gauge is straight and lined up with it. Misalignment can cause inaccurate measurements and may damage the gauge or the part.
  • Insert the gauge gently: Insert the gauge slowly and gently into the hole or feature. Be careful not to damage the gauge or the part. Ceramic pin gauges fit tightly in the hole without needing too much force.
  • Rotate the gauge: After fully inserting the gauge, gently wiggle it to make sure it’s in place. The gauge needs to touch the hole’s walls for an accurate measurement.

Reading the Ceramic Pin Gauge

To determine the size of the hole or feature being measured, follow these steps:

Carefully take out the gauge from the hole or feature, making sure that you don’t harm the gauge or the part.

  • Measure the gauge: Measure the gauge’s largest point with a precise tool like a micrometer. Make sure to calibrate the measuring tool correctly and use the appropriate technique for that tool.
  • Determine the size: To make it clearer, measure the diameter and then subtract the nominal size of the gauge, which is marked on either the gauge or its storage case. This will help you determine the size of the hole or feature. If you use a 10mm ceramic pin gauge and the diameter is 10.02mm, the hole or feature is 0.02mm bigger than 10mm.

Best Fixtures For Keyence IM-6225, IM-7020 & IM-7030

Keyence’s IM Series Instant Measurement systems are devices that help industries improve inspection and measurement efficiency. They include the IM-6225, IM-7020, and IM-7030 models. Advanced optics, high-resolution cameras, and powerful software work together in these systems. They capture and analyze images of parts, giving quick and precise measurements of dimensions. To get the most accurate measurements from these systems, you need to use the right fixtures to hold the parts in place during inspections. Let’s talk about the top fixtures for Keyence IM-6225, IM-7020, and IM-7030. We’ll explain their features and benefits in various industrial uses.

Universal Fixturing Solutions

Fixturing solutions work for many part sizes and shapes. They are an excellent fit for Keyence IM Series systems in different industries. These tools have parts that can be changed easily to fit different inspection requirements. They include adjustable components like clamps, bases, and supports.

Modular Fixturing Systems

Modular fixtures are widely used with Keyence IM Series devices. They are versatile, customizable, and a popular choice. The systems have a base plate and different parts like clamps, supports, and locators. You can put them together fast to make a custom fixture for any part you need. The design is modular, so you can quickly change it for different parts or inspections. It’s easy to adapt. Some modular fixturing systems that work with Keyence IM-6225, IM-7020, and IM-7030 are popular.

  • R&R Fixtures
  • Renishaw QuickLoad™ Corner (QLC)
  • Phillips Precision’s Inspection Arsenal®

Vacuum Fixturing Systems

Vacuum fixtures use suction to hold parts during inspection. They’re great for fragile or intricate parts that are hard to hold with typical clamps or supports. Vacuum systems have a base and vacuum cups. The cups can be changed to fit various shapes and sizes of parts. Vacuum fixturing systems compatible with Keyence IM-6225, IM-7020, and IM-7030 include:

  • VacuGrip™ Vacuum Fixturing Systems
  • Pierson Workholding’s SmartVac II™

Custom Fixturing Solutions

Custom fixturing solutions for Keyence IM-6225, IM-7020, and IM-7030 are important for precise and efficient inspections and measurements in multiple industrial uses. There are two ways to hold parts in place, 3D-printed fixtures, and machined fixtures. Each one has its advantages.

3D-Printed Fixtures

Additive manufacturing technology is used to create custom fixtures that match the size and shape of individual parts using 3D printing. This approach offers several advantages:

  • Rapid prototyping:  3D printing makes it fast to create fixtures, so manufacturers can test and improve their designs quickly.
  • Design flexibility: 3D-printed fixtures are easy to modify. Manufacturers can quickly change their designs to fit new part shapes or inspection needs.
  • Cost-effectiveness: 3D printing can lower the cost of making custom fixtures by removing the need for costly tooling.
  • Material versatility: 3D printing can use many different materials, like plastic and metal. This helps manufacturers choose the best material for their needs.

Machined Fixtures

Custom machined fixtures are made out of materials like aluminum or plastic. These fixtures offer several key benefits:

  • Precision: Machining can make precise fixtures that hold parts well for inspection.
  • Durability: Machined fixtures are stronger than 3D-printed ones and can be used for a long time in tough factories.
  • Customizability:  Machined fixtures are made better by adding clamps, supports or locators. This makes them more useful and adaptable to different parts and inspections.

Scalability: Machining is good for making things in large amounts. It’s easy to make more when you need to.

How Many Types Of Micrometers Are There?

Micrometers measure small dimensions with high accuracy and precision. They are used in industries like manufacturing, engineering, automotive, and aerospace. The measuring tool has two parts – a spindle and anvil. A screw mechanism adjusts them to measure object dimensions. There are different types of micrometers, each designed for specific purposes. To use them properly, it’s important to know their unique features and functions. This article gives an overview of micrometers and how they’re used in different industries.

  • Outside Micrometers

The most popular type of micrometer is the outside micrometer. It is used to measure the size of things outside, like the thickness of plates or rods. It can also measure the width of flats. The measurement tool has three parts: a U-shaped frame, an anvil, and a spindle. You can adjust these parts using a screw to fit around what you want to measure. The micrometer’s design determines how to read the measurement. It can be from a scale, dial, or digital display.

Micrometers are commonly used in metalworking, machining, and manufacturing to measure the size of products accurately, which is essential for maintaining quality and efficiency.

  • Inside Micrometers

Micrometer types for measuring internal dimensions are called inside micrometers. They can measure the diameter of holes, the width of slots, and the distance between two opposing surfaces. These devices have a rod or tube that includes a spindle and anvil. The screw mechanism adjusts them to fit the object being measured. The micrometer’s design will determine how the measurement is displayed. It may be shown on a graduated scale, dial, or digital display.

Inside Micrometersare often used in industries like machining, metalworking, and woodworking. They are necessary for maintaining product quality and process efficiency.

  • Depth Micrometers

Depth micrometers are used to measure the depth of holes, slots, or recesses in objects. The tool has three parts: a flat base, a tube with a spindle, and a screw to move the spindle. The micrometer’s design determines how you see the measurement – on a scale, dial, or screen.

Many industries like machining, metalworking, and manufacturing use depth micrometers. These devices ensure accurate depth measurements, which are crucial for maintaining product quality and process efficiency.

  • Tube Micrometers

Tube micrometers measure the thickness of tubes, pipes, and cylindrical objects. They’re made for this purpose. The tool has a U-shaped frame, an anvil, and a spindle. A screw mechanism is used to adjust them to the size of the object being measured. The anvil is round or cone-shaped to fit the tube or pipe.

Tube micrometers are often used in industries like automotive, aerospace, and manufacturing. They help measure wall thickness accurately, which is vital to maintain product quality and process efficiency.

  • Screw Thread Micrometers

Screw thread micrometers are designed to measure the pitch diameter of screw threads. The measurement tools have special anvils and spindles with matching thread shapes. A screw mechanism adjusts them to fit the threads being measured. The micrometer displays the measurement on a scale, dial, or digital display. How it shows the measurement depends on how it’s designed.

Screw thread micrometers are used in many industries like machining, metalworking, and manufacturing. They accurately measure threads to keep product quality and process efficiency.

  • Digital Micrometers

Digital micrometers, also called electronic micrometers, are a modern option to the older mechanical micrometers. The device has a screen that shows the measurement directly. You don’t need to do calculations manually and it reduces mistakes. Digital micrometers have extra features. You can switch between metric and imperial units. They can set zero at any position and send data to other devices, such as computers.

Industries, like electronics, medical, and precision engineering, use digital micrometers for precise measurements because they are becoming more popular. These tools measure the sizes of small parts, look at delicate components, and check quality.

Dial Vs. Digital Caliper What’s The Difference

Calipers are tools used in many industries to measure length, width, and depth accurately. They are essential in fields like manufacturing, engineering, and aerospace. Dial and digital calipers are very accurate, easy to use, and versatile. They are the most popular types of calipers available. We’ll compare the dial vs. digital caliper in this article. You’ll learn about their unique features, advantages, and disadvantages. This will help you choose the right measuring tool for your needs.

Dial Calipers

Dial calipers are tools that show measurement using a dial. The dial indicator has a needle that moves around a scale. You can read the measurement in metric or imperial units. The caliper’s jaws adjust to fit the object being measured. The needle shows the measurement on the dial.

           Advantages of Dial Calipers

  • Dial calipers tend to last longer than digital calipers. This is because they don’t rely on electronic parts that can easily get damaged by impacts, moisture, or temperature changes.
  • Dial calipers don’t need batteries or external power. They are great for users who want a measuring tool that’s always ready. They are reliable and low-maintenance.
  • Dial calipers are simple and easy to use. You can read the measurement directly on the dial. This makes them perfect for those who like straightforward tools.

Disadvantages of Dial Calipers

  • Dial calipers have lower resolution than digital ones. This can make precise measurements harder, especially for small or complex parts.
  • Dial calipers can have reading errors. This is because users have to read the dial’s measurement by themselves. It can lead to misinterpretation or parallax errors.

Digital Calipers

Electronic calipers, or digital calipers, display measurements on a screen, so you don’t need a dial or scale. The display shows the measurement in metric or imperial units. It can do other things, too, like switch the units, set zero at any place, and output data for computers or devices.

Advantages of Digital Calipers

  • Digital calipers have better resolution than dial calipers. This makes it easier to measure small and intricate parts with precision.
  • Digital calipers show measurements on a screen, so it’s easier to get accurate readings. That way, you don’t have to worry about making reading mistakes.
  • Digital calipers have more features to make measuring easier, like changing units, resetting the zero point and sending out data.

Disadvantages of Digital Calipers

  • Digital calipers need batteries or external power. This could be a problem if you need a measuring tool that’s always ready, or if you work where it’s hard to replace batteries.
  • Digital calipers may not be as durable as dial calipers due to their sensitivity to impacts, moisture, and temperature. This can cause reliability issues as they contain electronic components.

Factors to Consider When Choosing Between Dial and Digital Calipers

  • Accuracy and Resolution: Dial and digital calipers give precise measurements. But digital ones are easier to get exact measurements for small or complex parts due to their higher resolution. Your work may need high-resolution measurements. In that case, a digital caliper could be a better option.
  • Ease of Use and Reading: Digital calipers show the measurement directly on the screen. This makes it easy for users to get accurate readings and reduces the risk of errors. Dial calipers need users to read measurements from the dial. This can cause mistakes by making it hard to know where to read. If ease of reading is crucial for your work, a digital caliper may be the better option.
  • Durability: Dial calipers last longer than digital ones because they don’t have electronics that are easily affected by impacts, moisture, or changes in temperature. A dial caliper might work better if you work in tough places or need a sturdier measuring tool.
  • Additional Features: Digital calipers have extra features like unit conversion, zero-setting, and data output. These features can make it easier and faster to measure things. If you need more features, a digital caliper might be the best choice.

Best Fixtures For Keyence IM-6225, IM-7020 & IM-7030

Calipers are important measuring tools used in many industries, including manufacturing, engineering, automotive, and aerospace. They measure objects with high precision, both inside and out. There are many types of calipers, each with different features and benefits. It’s important to know what they do and where to use them. This article gives an overview of calipers. It explains their functions and uses in different industries.

Calipers Introduction

Calipers are tools used to measure the size of an object – its length, width, height, or diameter. These tools have two jaws that adjust to measure the size of an object accurately. Industries need precise measurements to make good products and work well. So they use calipers a lot. Technicians and engineers can ensure accurate measurements and high-quality standards by knowing different types of calipers and their functions.

  • Vernier Calipers

 Vernier calipers are common and have a main scale and a sliding vernier scale. The main scale measures in millimeters or inches. The vernier scale gives more precision for smaller measurements. The user places the jaws around or inside the object being measured. Then, they combine the main scale and vernier scale values to get the reading.

Vernier calipers are cheap and easy to use. They are favored in many industries. People use these to measure mechanical parts, inspect products and assure quality.

  • Dial Calipers

 Dial calipers look like vernier calipers but use a dial instead of a scale. The dial indicator shows the measurement directly. It’s easy to read and reduces errors. You can get dial calipers in metric or imperial units. They’re very accurate and precise.

Industries like aerospace, automotive, and manufacturing use dial calipers for precise measurements. They are often used to measure the size of mechanical parts, check finished products, and control quality.

  • Digital Calipers

 Digital calipers are a modern option to traditional vernier and dial calipers. They are also called electronic calipers. They have a digital display that shows the measurement directly. This removes the need for manual calculations and lowers the chance of errors. Digital calipers have added features. You can switch between metric and imperial units and zero-set them at any position. They also offer data output that lets you connect them to computers or other devices.

Industries like electronics, medical, and precision engineering use digital calipers for exact measurements. These calipers are becoming more popular. These tools measure small parts, inspect fragile components, and verify that quality standards are met.

  • Inside Calipers

Inside Calipersare made for measuring the inside of objects. For example, they can measure the size of holes, slots, or the space between two surfaces facing each other. They have bent or curved jaws which can adjust to fit inside the object being measured. This gives an accurate measurement of its internal size.

Many industries, like machining, metalworking, and woodworking, need to make precise measurements inside products. To ensure quality and efficiency, they use inside calipers.

  • Outside Calipers

Outside Calipers measure the outside of things like rods, flats, and plates. These devices have jaws that adjust to fit around the object you want to measure. This gives an accurate measurement of its size.

Industries like metalworking, woodworking, and manufacturing commonly use outside calipers. Accurate external measurements are crucial for maintaining product quality and process efficiency.

  • Divider Calipers

Divider calipers, also called compasses, mark distances and transfer measurements between objects. They have two sharp, pointed legs that can be moved to the desired distance. You can use them to draw lines or mark points on an object’s surface.

Divider calipers are often used in industries like woodworking, metalworking, and drafting. They help ensure accurate marking and layout, which are important for quality and efficiency.

6 Different Types Of Calipers & Their Functions               

Calipers are important measuring tools used in many industries, including manufacturing, engineering, automotive, and aerospace. They measure objects with high precision, both inside and out. There are many types of calipers, each with different features and benefits. It’s important to know what they do and where to use them. This article gives an overview of calipers. It explains their functions and uses in different industries.

Calipers Introduction

Calipers are tools used to measure the size of an object – its length, width, height, or diameter. These tools have two jaws that adjust to measure the size of an object accurately. Industries need precise measurements to make good products and work well. So they use calipers a lot. Technicians and engineers can ensure accurate measurements and high-quality standards by knowing different types of calipers and their functions.

  • Vernier Calipers

 Vernier calipers are common and have a main scale and a sliding vernier scale. The main scale measures in millimeters or inches. The vernier scale gives more precision for smaller measurements. The user places the jaws around or inside the object being measured. Then, they combine the main scale and vernier scale values to get the reading.

Vernier calipers are cheap and easy to use. They are favored in many industries. People use these to measure mechanical parts, inspect products and assure quality.

  • Dial Calipers

 Dial calipers look like vernier calipers but use a dial instead of a scale. The dial indicator shows the measurement directly. It’s easy to read and reduces errors. You can get dial calipers in metric or imperial units. They’re very accurate and precise.

Industries like aerospace, automotive, and manufacturing use dial calipers for precise measurements. They are often used to measure the size of mechanical parts, check finished products, and control quality.

  • Digital Calipers

 Digital calipers are a modern option to traditional vernier and dial calipers. They are also called electronic calipers. They have a digital display that shows the measurement directly. This removes the need for manual calculations and lowers the chance of errors. Digital calipers have added features. You can switch between metric and imperial units and zero-set them at any position. They also offer data output that lets you connect them to computers or other devices.

Industries like electronics, medical, and precision engineering use digital calipers for exact measurements. These calipers are becoming more popular. These tools measure small parts, inspect fragile components, and verify that quality standards are met.

  • Inside Calipers

Inside Calipersare made for measuring the inside of objects. For example, they can measure the size of holes, slots, or the space between two surfaces facing each other. They have bent or curved jaws which can adjust to fit inside the object being measured. This gives an accurate measurement of its internal size.

Many industries, like machining, metalworking, and woodworking, need to make precise measurements inside products. To ensure quality and efficiency, they use inside calipers.

  • Outside Calipers

Outside Calipers measure the outside of things like rods, flats, and plates. These devices have jaws that adjust to fit around the object you want to measure. This gives an accurate measurement of its size.

Industries like metalworking, woodworking, and manufacturing commonly use outside calipers. Accurate external measurements are crucial for maintaining product quality and process efficiency.

  • Divider Calipers

Divider calipers, also called compasses, mark distances and transfer measurements between objects. They have two sharp, pointed legs that can be moved to the desired distance. You can use them to draw lines or mark points on an object’s surface. Divider calipers are often used in industries like woodworking, metalworking, and drafting. They help ensure accurate marking and layout, which are important for quality and efficiency.