

Hardness is defined as the measure of resistance that a material has when force is applied to it. Others may refer to hardness as the ability of a substance to resist scratching, cutting or abrasions. There is a direct relationship between the level of hardness of an object and the level of its resistance. The greater the hardness, the greater the resistance. Hardness is largely determined by a substance’s microstructure. Hardness matters because it gives us an indication of how the material will stand up against pressure. This has implications on how the material can be used and what kind of pressure it can withstand. For this reason, measuring hardness is a routine procedure in most quality control processes. Here are some of the ways of facilitating Rockwell hardness tests.
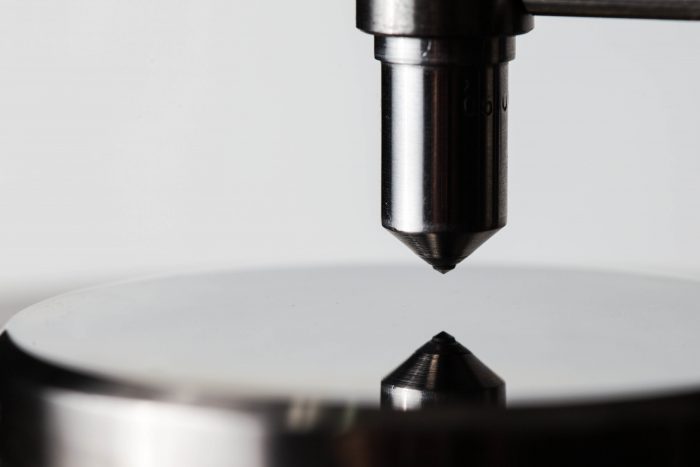
Check Indenter
Before carrying out a Rockwell hardness test, it is critical to ensure that there is no chipped or cracked diamonds on the indenter. This is because any of such anomalies are likely to lead to errors in the readings. Experts recommend checking the indenter every week with a magnifying device (such as a Jeweler’s eye loop). However, it might be hard to tell if the indenter is damaged. For this reason, if you notice consistent erroneous readings, this might be another clue that there is a problem with the indenter.
Verify Hardness Readings
Before performing a test, experts recommend that you test the hardness of a test block. This is a block with a hardness that is already known and thus the idea is to check if the reading from the tool is consistent with the known hardness. It is usually standard to do at least three tests in order to establish a consistent reading. It is also standard to discard the first reading after an indenter or an anvil change.
Keep the Rockwell Hardness Tester Clean
Debris, dirt and other contaminants can affect readings. It is important to remove and clean the indenter and anvil before you start testing. It is also critical to do this at every break between the shifts so that all parts of the tester stay clean throughout the day.
Smoothen Surfaces
When testing objects that are rough or that have textured surfaces, it is important to be aware that these kinds of surfaces can affect the readings obtained from the tester. To help overcome these kinds of problems, ensure that you lightly sand the surface to reduce the roughness.
Watch out For Movement
If you get any movement of the part while doing a test, you should discard the reading and perform another test. You should also avoid including these readings in your final average. This is because the movement of the part can affect the accuracy of the test.
Watch out for the Edge
When you take readings very close to the edge, it might cause problems with the reading and might even damage the indenter. Ensure that all readings are made at least 2.5 times the diameter of the indenter from the edge. The key to note is that if the metal buckles outward, then you have positioned the indenter too close to the edge.