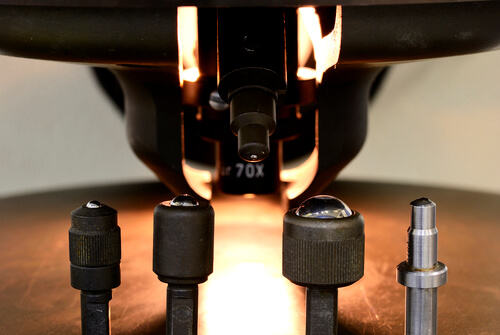
The ability of a material to resist permanent indentation is known as hardness. It is an empirical test, rather than material property. In order to define different hardness values for the same piece of material, there are several types of hardness tests. The outcome of each test should have a label identifying the method used, as it is dependent on it. There is no intrinsic significance of hardness value or number, hence it cannot be used directly like tensile test value. The value is only useful for comparing different treatments or materials.
Testing is widely employed for process control and inspection, and the outcome is used in estimating mechanical properties like tensile strength. It is usually done using testing machines fitted with an indenter that is enforced into test matter over a period of time. The indentor’s shape varies by the hardness test type, and includes pyramid, ball and cone shapes. Each machine also makes use of different load or force application system, while recording a hardness value in kg-force as per the individual scales.
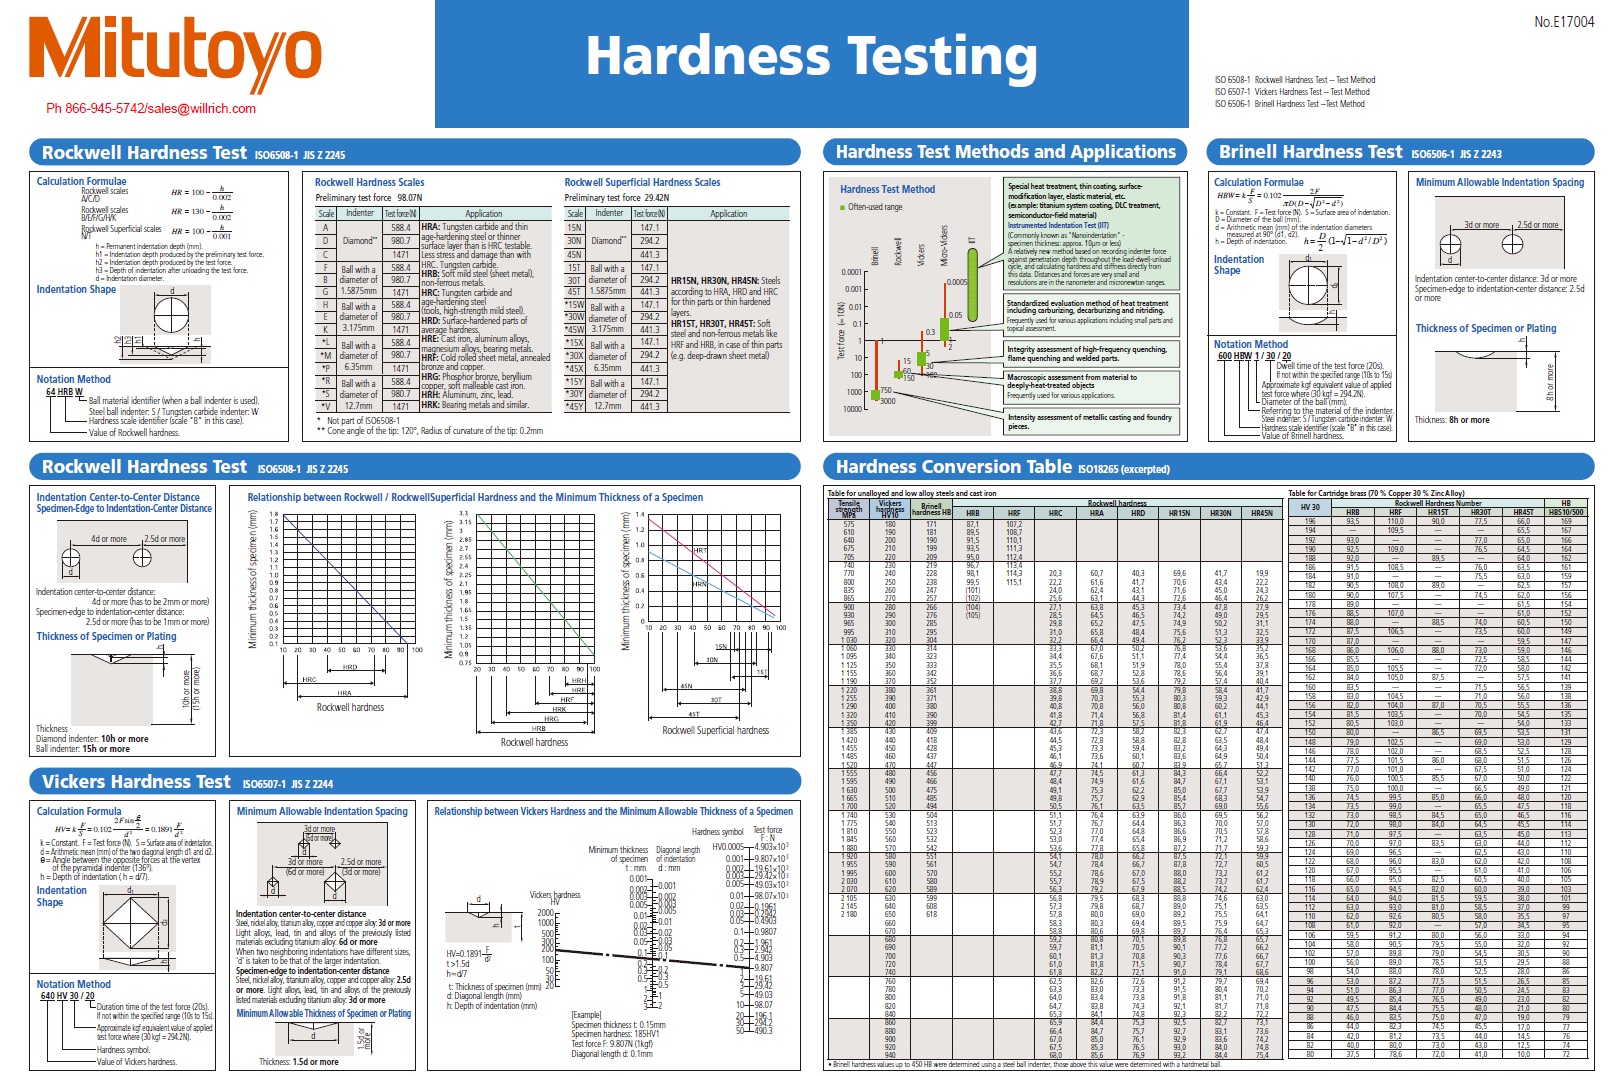
Brinell Hardness Test
During this test, an accurately controlled force is maintained when an indenter, generally a carbide ball, is forced into the test model for a specific period of time. Upon removal, it leaves an encircling indentation, the measurement of which is taken to calculate material hardness as per the formula.
Rockwell Hardness Test
There is also a Superficial Rockwell, along with a Rockwell Hardness Test. For each individual test, a little load is forced to either a steel ball or diamond cone indenter located on the surface of the test material to set up a zero reference point. This is followed by applying the main load for a specific period of time, with the minor load applied on releasing. The hardness number is the variation in deepness between the shift due to major load and the zero reference position.
The selection of an indenter depends on the features of the test material. In comparison to Superficial Rockwell, the Rockwell Test applies bigger load values, although both of them offer three load options that are major. Over 30 different scales are employed between Superficial Rockwell and Rockwell testing, because of various combinations and choices of major loads, indenters and tests.
Knoop Hardness Test
This Micro hardness Test is employed on miniature material feature that cannot be put on test by other methods. It uses a testing load of 1 Kg or less. Just like the Brinell hardness test, the Knoop is performed by applying force to an indenter in a rhombus-shape over a period of time. Meticulous measurement of the impression is done, and is employed alongside test load for calculation of value on the scale.
Vickers Hardness Test
With a maximum test load of 50 kg, the Vickers Hardness Test can be performed on both the macro and micro hardness scales. This sort of test is done by putting controlled force to an indenter over a period of time, which is a square-shaped diamond pyramid. The test load and impression measurement are employed with the required formula for calculating Vickers hardness value. Like Knoop and Brinell, this test has a scale that takes care of the entire range.
FILL IN BELOW FORM TO RECEIVE YOUR FREE HARDNESS TESTER SYMBOL AND DEFINITION CHART
Mitutoyo_Hardness_Tester symbols
rockwell hardness measurement of metallic materials


