Top Tips To Getting More Accurate Height Gage Measurements

height gage measurement

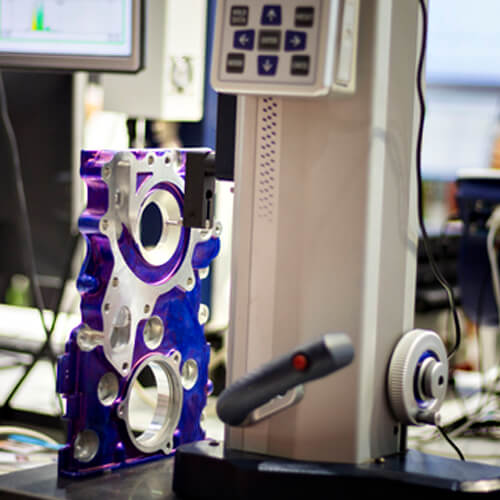
The height gage is a theoretical extension of handheld caliper gage, with the only difference being that it rests on a heavy base, keeping the scale square. Today, height gages are designed not only to measure heights, but also distances, diameters and bolt circle patterns.

Basically, there are three types of height gages:

  • Vernier Height Gages
  • Circular Height Gages which sets measurement height with a dial indicator.
  • Digital height gages where references can be set at any position other than a particular surface plate. It allows for direct reading.

How To Set Up The Measurement?

Setting up a manual gage is simple. You just need to have a couple of critical references. For an automated gage, it can be done automatically, whereas for manual, it is zeroed on the granite plate. This is important for all measurements you make, so it is worth the effort and time.

Another critical reference is the adjustment for probe ball diameter. It is not important if you are only measuring the length, but if diameters, grooves or hole locations are in question, you need to take this into account. Height gages with basic electronic control can be measured as a part of setup routine and included automatically in the measurements. Gage check should be done a number of times, just like setting the 0 reference. When the probe tip is changed, it is critical to recheck the ball diameter; else the outcome could be disastrous.

How To Take The Measurement?

In a manual gage, the measurement is taken by bringing the sensitive contact up to the required height and touching off on the surface being measured. A digital counter will automatically give you the designated height. Digitized versions work on a similar principle. Apart from setting a zero reference, there are other parameters including gaging pressure, settling time and contact speed. When the measurement is ready to be taken, the measuring carriage is slid over the part and the height measurement button is pressed. The measurement is displayed once the motorized drive brings the contact to the surface.

With modern height gage these days, the measurements are stored, and from that, data heights, diameters, midpoints and relationships are just a keystroke away. Automation has also accelerated the measuring process with motorized slides and digital control.

What Are The Sources Of Error?

All height gages have some inherent issues, and problem becomes bigger with larger height gage. The actual problem lies with the relation of the height to base. There can be errors in the setup as well.  The biggest flaw in the design of a basic gage is taking one that was to measure 12 inches and extending it to measure 36 inches, without altering the base design. In this case, the gage tends to flex and wobble, influencing the final measurement.

In order to reduce the flexure of the post, try to increase the performance of the gage, although it is just a partial enhancement. The main thing is to make the base wider and longer, and build some mass. Reducing the ratio of the post to the base will enhance performance.

by George Chitos