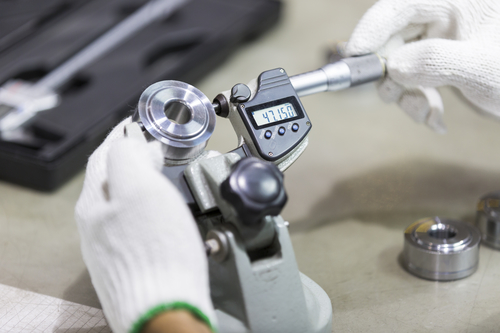
Snap gages are basically go/no go gages that measure outside diameters. Their appearance is similar to micrometers. A snap gage also features anvils that can be found on a micrometer too. You should keep in mind that snap gages come in an array of sizes and shapes. There can be types A, C, and U, and the gages may come with dial or digital indicators. Apart from measuring outside diameters, snap gages can be used for measuring widths and groove diameters. In this post, we will focus on one of the main variations of snap gages – adjustable snap gages. You will learn how to master this extremely useful gage.
Ensure that Your Adjustable Snap Gage Suits the Particular Application
You can’t fit a square block into a circular hole, right? The anvils of your adjustable snap gage should be narrower than the part that is being measured. This helps prevent uneven wear on important measuring surfaces. If you continue to gage narrow parts on a broad anvil, the grooves will wear out and they won’t be picked up by mastering. This is a major problem especially when you are doing a production run. So, consider modify existing anvils or purchase different ones for each job.
Look Out for Signs of Wear and Tear
You need to cultivate the habit of checking anvils for signs of wear. Look out for rust issues, pitting, unevenness, gouges, scratches, and more. If you detect problems early, you can remove the anvils, and lap and ground their surfaces. Next, conduct periodic checks on anvils to ensure that they are parallel. How do you check for parallelism? Place a steel ball or precision wire at the front, back, left, and right edges of the anvil. After placing the wire or ball in that sequence, you can compare the indicator reading for each edge.
Always Observe Proper Gaging Practice
It is a good idea to check for any loose components, clean the gage regularly, and prevent your gage from being exposed to rapid temperature changes. If you are managing large production runs, you should buy a master disc that is the size of your part. If you are handling small production runs, you can consider utilizing stacked gage blocks.
Hold Firmly, and Square It Up by Eye
Oftentimes, the wide anvils will ensure that the gage positions squarely on the part. If you currently use narrow blade anvils, you need to hold the gage steadily when checking narrow grooves. Don’t forget to square it up by eye too. To accommodate the shortcomings of offset blade anvils (side-loading can reduce repeatability), you can use a .005″ resolution dial indicator.
Don’t Drop Adjustable Snap Gages
Did you detect an out-of-parallel condition while measuring a part? If you have not replaced the anvils, it means that you or someone has dropped the adjustable snap gage. To fix this issue, you need to remove the fixed, lower anvil. Next, file the seat in the indicated direction with caution. You should file slowly, i.e. with a few gentle strokes. After that, re-attach and secure the anvil before testing for parallelism. The seating of the upper, moveable anvil should remain untouched first. However, you do not need to go it alone. You can send the faulty snap gage to a company that specializes in metrology equipment repairs.


