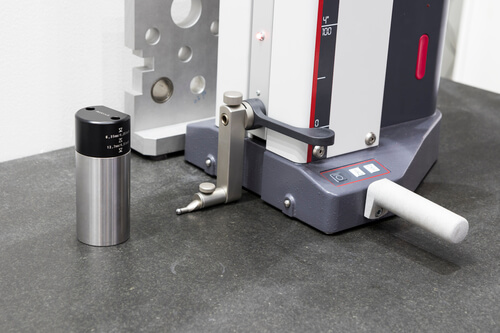
With all of the types of height gages available, and with each of their matching applications, it might be hard to decide which one is the most appropriate for you. Which gage will meet your needs? The following will hopefully help you distinguish between not only the different types of height gages but the various purposes for which they were designed.
- Air Gages
- Bore gages
- Calipers
- Calibration Equipment
- CMMs Coordinate Measuring
- CMM Sensors, Probes & Styli
- Computed Tomography – CT Scanners
- Concentricity Gages
- Contour Measurement
- CUSTOM GAGES & FIXTURING
- CYLINDRICAL GO / NO GO / MASTERS
- Data Collection & SPC
- Depth Gages
- Fixtures & Part Holding CMM, Vision, Optical
- Force & Torque Gages
- Gage Blocks
- Gear & Spine Measurement
- GRANITE SURFACE PLATES, SQUARES & PARRALLELS
- HARDNESS TESTERS
- Height Gages
- HEX, HEXALOBE GAGES & SQUARE GAGES
- ID / OD GAGES & SNAP GAGES
- Indicators & Comparator Stands
- Laser Micrometers
- Layout and Shopfloor
- MICROMETERS
- MICROSCOPES & BORESCOPES
- Optical Comparators, Overlay Charts and Readouts
- Robotics and Automation
- ROUNDNESS & FORM
- SHAFT MEASUREMENT
- Structured Light 3D Analysis
- Surface Roughness Testers
- Thread Gages
- Video Measuring Machines
Blog
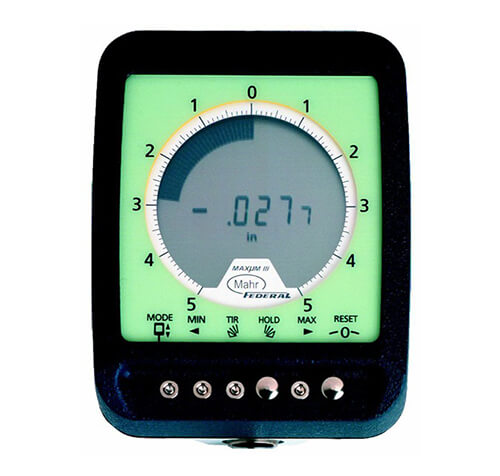
Product Spotlight: Mahr Federal Maxum III Digital Comparator
The Mahr Federal Maxum III Digital Comparator will be the focus of this piece. But, first things first – what is a digital comparator? Also referred to as a magnitude comparator, it is a device classified casually as a hardware electronic. It is used in MCUs (microcontrollers) and CPUs (central processing units). It determines whether one number is equal to, less than, or greater than another number. (Two numbers are taken as input in binary form.)
What You Should Know About Digital Height Gages
Digital height gages sometimes get a bad rap. People refer to them as nothing more than a giant-sized caliper based, apparently, on its range of motion. But there is so much more to a digital height gage than that. It is, without a doubt, a benchtop gaging measurement system of the most sophisticated and accurate nature. Not only that, the multitude of tasks that it can perform reliably and quickly are impressive.
How To Buy A Height Gage That Meets Your Precision Measurement Needs
Today’s height gage, in addition to being a measurement tool capable of versatility and highly precision measurements, comes in a variety of styles. What kinds of height gages are we talking about here? There are gauge block-based styles, complex or simple electronic cages, digital height gages, and the old school Vernier style.
Are You Using The Correct Thread Gages?
When inspecting threaded shafts and holes, thread gages are a highly common application tool. But, should you use ring gages or plug gages? Generally speaking, threaded holes of manufactured parts are checked by plug gages. Ring gages, however, can check fastener diameter, dowel diameter, and shaft. It’s not particularly common, but it is important.
But what about checking non-threaded parts? Here, smooth ring gages can be put to good use. What other kinds of gages can be used?
What You Need To Know About OD/ID Concentricity
In the case of tube sourcing, is it possible to avoid OD/ID concentricity requirements? After all, they can be just one giant headache. The world of small parts is, indeed, not a perfect world. That’s why we have tolerances. But occasionally, when concentricity is required (by the indication on a drawing), the measurement of concentricity is next to impossible to achieve. Knowing the following about concentricity can help you understand why.
Steel Gage Blocks vs. Ceramic Gage Blocks
Steel gage blocks or ceramic gage blocks – which to choose? Before we get into that, let’s take a quick look at gage blocks themselves. First of all, what are they?
How To Measure Concentricity
As evidenced by the title, today we’re going to take a look at how to measure concentricity, what it is, and other related areas. First of all, let’s start off with a description.
Solving Measurement Challenges With Optical Comparators
Certain challenges that simply can’t be solved through other approaches can more easily be remedied through the use of optical measurement… Enter optical comparators.
But why and when is the time to use optical measurement?
Height Gages Can Do Much More Than Just Measuring Height!
Digital height gages can, with their long range of motion, be looked at as a sort of giant caliper. They do, however, possess a heightened level of accuracy because they are, as a benchtop gaging system, far more sophisticated. Reliably and quickly, a wide range of measuring tests can be performed by these extremely versatile gages. What’s more, they are easy to maintain, to use, and to set up.
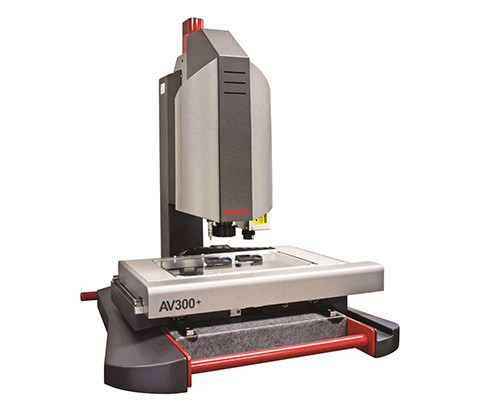
Product Spotlight: Starrett Galileo Series AV300 Automatic Vision Systems
Automatic vision systems are used for teaching programs and correcting product alignment with fiducials. A standard system uses a grayscale camera that comes, with various lensing options, to meet your process requirements. The great thing about this system is that its lens options can be customized to decrease or increase the depth of field and field of view. With that, the core components of an automatic vision system includes a processor, camera, lens, blue/red illuminator, and dark field. Some of the popular add-ons include fullview illumination, ClearVu lens, high depth of field, and 2x extenders.
Next, any image that can be viewed by the lens configuration and the camera can be used as an alignment image. You should keep in mind that automatic vision systems are not limited to using traditional bowtie or cross fiducial shapes. These systems can capture time, about 0.1 seconds per image. In this post, you will find out more about an excellent automatic vision system that can make the above tasks easier. Introducing the Starrett Galileo Series AV300 Automatic Vision Systems.
How Will Metrology Evolve In The Near Future?
The last 25-30 years have seen many advances in computerization, software applications and equipment use. Therefore, it is no surprise that metrology continues to benefit from these changes. With the advancement of 3D scanners and CMM laser scanners, the precision world of metrology during the process of manufacturing will continue to improve, as will the ability to ensure tighter controls over quality and inspection. There will be many more devices produced that will increase productivity not only in the manufacturing domain, but also in the automation industry.
CMM Laser Scanners Can Reduce Inspection Times
There are many parts that need precision analysis and checking. Quality is of paramount importance. However, until recently there were few procedures that could give such excellent results in terms of speed, accuracy and reliability. CMM laser scanners (or coordinate measuring machines) can provide all of these essential components in a fraction of the time previously required to obtain the same results.
Product Spotlight: Mitutoyo Outside Micrometer with Extension Anvil Collars
Outside micrometers are often utilized to measure external surfaces of spheres, blocks, shafts, and other common shapes in mechanical engineering. This type of micrometer is one of the most common micrometers used in the manufacturing industry as well. Today, you can find outside micrometers available in a wide variety of sizes, from 1″ to 12″ sizes. In addition, outside micrometers have the ability to measure one-inch increments and are accurate to four decimal places! Read on to find out more about an outside micrometer that’s available at Willrich Precision. It is none other than the Mitutoyo Outside Micrometer with Extension Anvil Collars.
Top Tips To Achieving Faster Precision Measuring Processes
If you need faster precision measuring or you are looking to speed up the process you already use. There are ways you can do this. Some of these include:


