The Importance Of CMM Calibration Artifact In Metrology

Metrology is the scientific study of measurement and it ensures that the calibrated CMMs deliver precise and accurate results with provable validity. The purpose of metrology is to maintain measurement standards while developing new methods of measurement and ensuring that these methods are standardized and accepted around the world.

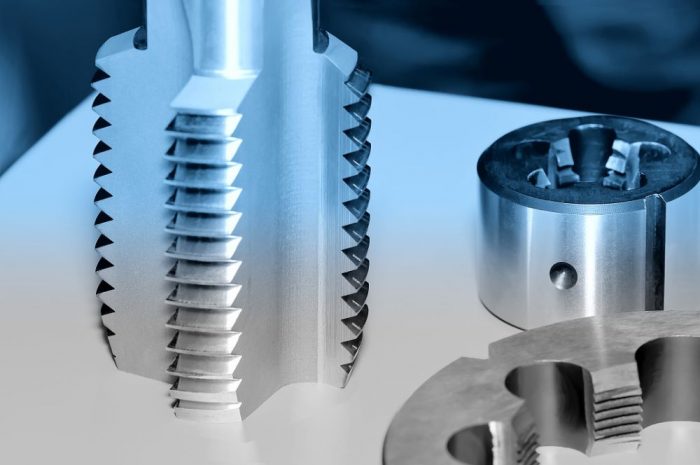
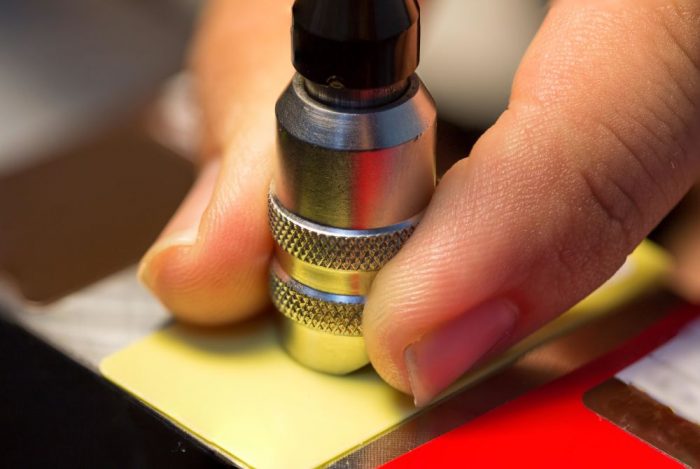
CMM calibration artifacts are important tools in metrology and have consistently been used to check for the quality of CMMs. Here are some reasons why they have been hugely important.

Ensures Accuracy

CMM calibration artifacts play an important role in metrology as they ascertain the measuring accuracy of the CMM. This ensures the performance and quality of the CMM and its ability to deliver precise and reliable measuring results.

This is done through the measurement process which assigns values to the property of an artifact and uses that as a benchmark for comparison against the measurement values of the CMM. The CMM calibration artifact thus helps to reduce or eliminate any bias and discrepancies in the measurement system of the CMM relative to the benchmark.

Verified and Traceable

Calibration artifacts, as the name suggests, have been calibrated. They are also traceable and all their measurements have been previously verified in the laboratory via a documented process, resulting in the calibrator’s drift errors being eliminated.

This makes them an excellent tool to calibrate CMMs and for their values to be used as a reference base to that of the CMM’s measurement values. This further eliminates any uncertainties or doubts about the precision of the measurements of the artifact.

Ensures Longer Life Span of CMM

CMM calibration artifacts also help to ensure a long instrument life span of the CMM. The CMM will wear down over time and much faster if used frequently. Rather than throwing away the CMM and replacing it every time it stops providing accurate measurements, you can use the calibration artifact to calibrate its measurements back to the correct levels. This is critical to the metrology and measurement precision of the CMM.

It also extends the life span of your CMM and prevents unnecessary expenditures while cutting costs. Moreover, the calibration artifact can also help you monitor the rate of degradation of the CMM and track other factors such as frequency of usage or environmental pressures that lead to faster wear and tear of the CMM.

Using this information, you can make the necessary adjustments to mitigate these factors and prevent extended wear and tear of the CMM. This ensures that your CMM is kept in a better condition for longer.

Increased Safety

Metrology ensures predictable performance from your measurement tools such as the CMM. Another way calibration artifacts are hugely important to metrology is because they help to increase the safety of CMMs through calibration, by ensuring the CMMs measurements are consistent and precise.

Minor inaccuracies may result in the CMM working incorrectly or false information about the safety of a certain product. Through regular calibration of the CMM via a calibration artifact, the CMM’s measurements will be more reliable and accurate, while also reducing unsafe situations.

Product Spotlight: What Is CMM Calibration Artifact?

A coordinate measuring machine (CMM) calibration artifact is used to ensure that the measurement data created by the CMM is accurate through regular calibration. The CMM calibration artifact also includes an ISO-17025 accredited certification and most CMM calibration can be accomplished through the use of a calibration artifact.

Importance of CMM Calibration Artifact

The CMM calibration artifact is an important tool that helps to gauge any inconsistencies or errors in the CMM measurements. This helps in providing accurate calibration data and in fixing or integrating any inconsistencies into the data. A CMM machine can have errors along 21 different measurement axes, thus depending on the severity of the errors, calibration may or may not be required more often.

Artifact Usage

The calibration artifact may be attached differently to the CMM depending on the type of calibration being done and the type of probe used. Some artifacts require a mounting bracket to be held in place for the calibration process while others can be mounted directly onto the CMM.

The calibration process involves measuring the artifact along with a fixed measurement plan and comparing the data points against the known dimensions of the artifact to check for consistency. By doing so, any error that prevents the CMM from accurately performing its function and measuring the inspected parts would be removed.

Different Artifact Types

Calibration artifacts help to measure the accuracy of measuring machines and this is done through the artifact containing a variety of geometry types such as spheres, cones, circles, and many more. Some common calibration artifacts include the ball plate, KOBA step gauge, end bar, hole plate, and swift-check gauge. Different artifacts may be chosen for the calibration of the CMM depending on the type of measurements being performed and the probe used.

Reminders when Using Calibration Artifact

When choosing a calibration artifact, it is best to choose an artifact that is similar in hardness to the material that is being measured. This is to prevent any inconsistencies due to material or probe deformation. Moreover, once the calibration artifact is installed in the CMM, it has to be given time to cool down and disperse its heat as the artifact is temperature sensitive and will react to the body heat transferred from the technician’s hands.

Sometimes when the CMM involves very precise measurements, the environment can also affect the calibration process. For example, differences in temperature or air currents in the lab can affect the calibration process. It is thus best to strictly control conditions when attempting to calibrate the CMM using an artifact to minimize any discrepancy.

Artifact Form and Material

The calibration artifact may differ in form and material depending on the kind of probe you are calibrating. The stiffness of the artifact material is also an important consideration when deciding which artifact to use as the contact force of the measuring probe may dent or deform the artifact. CMM calibration artifact forms also do not follow any specific rules due to the broad range of uses for CMMs.

Product Spotlight: 4 Models Of Universal Punch Concentricity Gage

Concentricity gages are utilized for inspecting the rotating parts’ exterior, internal, and flat surfaces. They also enable the co-axiality of more than two diameters to be measured and allow you to determine the runout of axial measurements. In short, they are designed to resolve inaccuracies in product dimensions and expedite manufacturing processes by providing accurate and reliable measurements. In the market, there are a wide variety of gages that are customized to meet unique and specific

Smart Spin Gage

The Smart Spin Gage is designed to measure the cylindrical components of the outer diameter and part edge runout in a short time (perpendicular to body diameter). The equipment incorporates a backstop that can be adjusted, roll clamping, and probe placement that can be orientated vertically and horizontally to handle a variety of component designs, geometric shapes, and sizes.

This product’s precision rotation and remote indicator RESET are enabled via an integrated STEPPER motor with specific drive control hardware and software. These specifications and features provide consistent outcomes with the correct setup for various component shapes and sizes within a given part size range. Additionally, component testing is available at two speeds – 10 and 20.

Universal Punch Concentricity Gage – Model A-10

The Universal Punch Concentricity Gage is a series of basic gage and standard carriers, comprising three major components – the gage model, main rollers, indicator, and accessories with this model. The concentricity gauges are classified into two types immediately, which are traceable to NIST. In this case, the accuracy of the standard black gage is assured to be =4um, while the precision of the gold gage is guaranteed to be =8um.

St. Mary Rotary “V” Block Gage

The accuracy of St. Mary Rotary “V” Block Gage speeds up the determining process of concentricity features, especially on cold-headed items. In addition, as compared to other comparable devices, it is much more simple and accurate. Geometric tolerances are necessary and required for cold-formed fasteners. This St Mary Rotary “V” Block Gage will be able to meet this need, being able to accommodate tight diameters.

Universal Punch Concentricity Gage Model H

Similar to Model A-10, the Universal Punch Concentricity Gage Model H consists of three main components – the gage model, main rollers, indicator, and other accessories. The part diameter and length capacity can be customized up to 1″ and 12″, respectively, while the gage length, width, and height are 12.5″, 5.5″, and 9″ approximately.

Work with Willrich Precision

With over four decades of experience inspecting, gaging, and metrology, Willrich Precision can confidently and effectively offer our customers a wide variety of products and services. We are equipped with the right equipment to support complex metrology measurements with sophisticated technology and measuring tools in laser and vision systems.

Taking pride in our role as a leader and supplier for measurement instrumentation technology, we have served a wide base of different clients from various industries. Our relationship with every client is unique, special, and valued – that’s why we offer a free consultation to allow you to speak to our team of expert, high-qualified service professionals who can provide you the help and assistance you need.

For more information about our range of services and products, please contact us at [email protected] today!

How To Measure Concentricity Tolerance

In the field of Geometric dimensioning and tolerancing (GD & T), concentricity is one type of complicated tolerance. It is usually used to establish the tolerance boundaries (otherwise called tolerance zone) where the median points of a spherical or cylindrical product design or feature are. It is often used for high precision components and when median points will need to be controlled. However, since measuring and verifying concentricity tolerance is a complex and time-consuming process, many engineers and product designers prefer and are usually advised to employ runout or position tolerance.

What Is the Tolerance Zone?

Establishing the tolerance zone before the manufacturing process is critical as this will determine the cost incurred and the success of your project. It is defined as the pre-determined horizontal length that extends from the outer edge wall to the opposite side. Concentricity establishes a 3-D cylindrical or spherical tolerance zone surrounding the datum axis, and all the central points will lie within the boundary. The diameter of this zone is considered the permissible and appropriate value for this callout.

When is Concentricity Tolerance Used?

Concentricity tolerance is complex and complicated; therefore, it is difficult to measure and calculate. It is usually used in transmission shafts, gear, or balancing equipment. This concentricity tolerance will determine the dimensions and size of the driving shaft to prevent any wobbling. First, the part’s real median axis must be determined to ensure concentricity by computing the midpoints of diametrically opposite locations. The median axis is obtained by connecting all such median sites. For the part to be approved in a standard engineering and designing process, all points on the median axis must be inside the cylindrical tolerance zone.

How is Concentricity Tolerance Measured?

The concentricity tolerance can be evaluated or measured in four basic steps. First, you will have to establish and identify where would the point of the datum plane, surface, or axis lies. Next, you will plot the points on the outer profile’s controlled surface, which can be determined using the CMM or a coordinate measuring machine. Then, you will have to measure and calculate where the central points and axis of the plotted profile are at different cross-sections. Lastly, you will need to verify where the positions of the central points within the cylindrical tolerance zone are.

Choose Willrich Precision

Willrich Precision has a well-established history of more than four decades in the fields of inspection, gauging, and metrology and carries a wide range of measuring tools, metrology equipment, and high precision instruments. We are considered by our clients as a pioneer in measurement instrumentation and are privileged to be able to serve a diverse range of clientele.

In our role as a frontrunner and provider of measurement instrumentation technology, we have served a wide range of clients from many industries. Our relationship with each client is exceptional, superior, and treasured – get in touch for a free consultation and speak to our team of highly-qualified service professionals who can provide you with the assistance you require.

For more information about our products and services, please feel free to contact us today!

How To Choose The Best CMM Calibration Artifact

Calibration artifacts are critical to the performance and quality of your CMM. They also help to ensure your measurement data are precise, accurate, and reliable. However, there are numerous calibration artifacts to calibrate different measurements.

Likewise, there are different types of CMMs and they can have errors anywhere along the 21 different measurement axes. Using the proper calibration artifact allows you to fix the corresponding measurement error and address any anomalies or discrepancies in the measurement data. Here are some tips to choose the best CMM calibration artifact.

Level of Precision

Before attempting to calibrate the CMM, you should first assess the level of precision required for the calibration. Is it simply to calibrate the faulty height measurements of the CMM? Is it to calibrate the probe angle of the CMM? Understanding the level of precision will give you a better analysis as to which calibration artifact to use.

This is because some calibration artifacts are better suited for high-level precision calibration while others are used for simple and daily calibration. For example, the swift check calibration artifact performs simple and quick checks on the CMM and delivers easy and clear results.

It consists of a length bar, ring gauge, and sphere that comprises all the geometries and directions required to check for the performance of the CMM. It helps to check for the daily measuring accuracy of every part of the CMM and has a standard precision level for calibration.

However, in cases where a higher level of precision is required in the calibration process, a laser interferometer is used. The laser interferometer is a calibration artifact that utilizes a laser with a beam splitter to make extremely precise measurements based on the reflected laser light.

Calibration Process

There are numerous CMM calibration processes and they require different calibration methods and artifacts depending on what you wish to measure. All calibration processes measure an artifact against a fixed measurement plan and the data points act as a reference base to be compared against the known dimensions of the artifact.

From there, the faulty measurements are rectified and the CMM is calibrated to remove any errors that would prevent it from accurate measurement. For example, if you wish to perform a coordinate calibration process or calibrate the height measurement of the CMM, you may choose a KOBA step gauge calibration artifact.

To perform a dimensional measurement calibration process, a rectangular gauge block would be used due to the vast selection of gauge blocks available.

Probe Material

The probe material is another important consideration in choosing the best CMM calibration artifact. When performing a CMM calibration, you want the artifact to be pretty similar in hardness to the material being measured.

This is because there will be contact force from the measuring probe to the artifact, thus if they are both similar in hardness, it will prevent any inconsistency or error in calibration results due to material or probe damage. Significant errors occur when the hardness of the material varies widely and this will affect the measuring accuracy of the CMM and the calibration process.

Benefits Of Using CMM Calibration Artifact

CMM calibration artifacts are important in ensuring the precision of CMMs and that they are working well within their specifications. This ensures the safety, quality, and innovation of CMMs and improves overall production and services.

If you look around your room or house, most of the items were produced within tight measurement specifications assured by calibration. CMMs are commonly used in various industries and through proper calibration using an artifact, their measurements will be more reliable and consistent. There are various benefits to using calibration artifacts and below are some of them.

Data Collection

Using a calibration artifact allows for data collection, generation, and analysis. To do so, the calibration artifact has to include sophisticated analog hardware, along with a microprocessor and software. This provides the calibration artifact with the internal comparison capability and references available to collect and track data at the time of calibration.

Measurement and tracking of any performance changes and drift relative to the internal references can likewise be stored for further analysis. This could come in very useful when a CMM that is reviewed once or twice every year goes out of calibration without the knowledge of the user. If critical tests and results rely on the CMM, this may have dangerous and costly consequences.

However, by using a calibration artifact with the necessary technology for data collection, external calibrations can be done alongside internal calibrations. Internal calibrations prevent the CMM from going out of calibration through the monitoring of the CMM performance between calibrations. This minimizes the chances of the CMM having to be constantly calibrated at the lab.

Data Analysis

Data from the calibration artifact can be stored and analyzed using statistical algorithms such as standard deviations. Artificial intelligence can also be used to analyze the given data to make better recommendations or simply list the important findings. Analysis of data is important as it allows the lab personnel to accurately pinpoint the cause of measurement errors in CMMs and how frequently they occur. This allows the user to better predict the performance of the CMM and take any necessary actions accordingly.

Versatile

Numerous calibration artifacts can be used for a variety of CMMs and different measurement axes. Different artifacts can also be used when there are different hardness or stiffness of the material to be measured in the CMM. For example, a swift-check gauge is a calibration artifact that comes equipped with a length bar, sphere, and calibrated ring gauge that incorporates all of the geometries and directions needed to check the performance of the CMM. It is versatile and can be used for small to medium-sized CMMs.

Confidence in Performance

Calibration artifacts give users confidence in the reliability and precision of their CMMs through checks and delivering results that are clear and easy. It further eliminates the cost and implications of a CMM being out of specification during use. Calibration artifacts ensure that CMMs provide better performance while fixing and minimizing any errors.

A Guide To CMM Calibration Artifact

A CMM calibration artifact helps to ensure the precision and accuracy of the measurement data from a CMM. This assures reliable results and benchmarks such as safety, quality, and equipment lifespan.

All CMM calibration artifacts adhere to the ISO 10360 series when performing calibration. Using calibration artifacts allows users to independently check and ascertain the measuring accuracy of the CMM as well as to detect any inconsistencies and correct them accordingly. It thus minimizes uncertainties and errors to an acceptable level.

How to Determine Calibration

A CMM can have errors along 21 different measurement axes. This means that a wide variety of calibration artifacts can be used to correct these errors and to ensure the accuracy of calibration data, which contributes to the fixing of these errors and their integration into the data system.

CMMs have different levels of calibrations which could range from weekly checks to checks once or twice every year. To effectively determine calibration, the error and inconsistencies in measurement data first have to be sieved out to determine which measurement axes are faulty. The corresponding calibration artifact can then be used to calibrate the measurement for that particular measurement axes.

Artifact Types

There are different types of CMM calibration artifacts used during the calibration process. This is due to the different measurements that can be calibrated in a CMM. Some common artifact types include the swift-check gauge, ball plate, ball and cone, end bar, length gauge blocks, and the KOBA step gauge. When choosing an artifact, it is important to choose one that has a similar hardness to the artifact being measured to prevent any probe and material damage.

Certain artifact types will be better suited for certain CMM calibration. Most CMMs require a custom artifact. For example, the KOBA step gauge consists of a one-dimensional test body with planned parallel measuring surfaces. It is best used with small volume CMMs such as multisensory systems and monitors height gauges.

Calibration Process

There are different calibration processes involved which require different methods and calibration artifacts depending on what you wish to measure. The calibration process involves measuring the artifact along with a fixed measurement plan.

This allows for a comparison of the data points against the known dimensions of the artifact and easier cross-checking in the event of any anomalies or inconsistencies in the data set. The result would be a calibration of the CMM that would remove all errors and allow the CMM to perform its function of accurate measurement.

Laser Interferometer

A laser interferometer is only used when a high level of calibration is required. It is also a calibration artifact and utilizes a laser with a beam splitter to make extremely precise measurements using the reflected laser light.

The interference pattern created by the reflected laser light is tracked and so are the CMM’s movements via computer software. Any anomalies or inconsistencies in the data set are likewise corrected. The laser interferometer requires a longer calibration time than other artifacts and should only be handled by an experienced technician.

Can Burrs Be Automatically Detected In Injection Molding Procedures?

Burrs are fairly common during the prototyping processes such as die-casting, injection molding, and machining. For instance, when two mold prototypes do not completely meld in the plastic injection molding process, burrs can usually occur due to inconsistencies and incompatibilities in injection parameters. As a result, this could result in consequences such as limiting the workpieces’ functionality and viability or blemishing the workpieces’ visual aesthetics.

In any case, the automatic detection of burrs has always posed a challenge to engineers and designers. This is especially problematic in plastic injection workpieces, where extra precautions have to be taken to reduce the formation of burrs. Therefore, many solutions integrate automatic detection targeted at specific parameters and work areas.

Detection in the Measuring Process

As the saying goes, prevention is better than cure. In most cases, it might be best to avoid the issue before it has even occurred – and this could start during the measuring sequence, where software is used in conjunction with the consideration of position deviations and forms to reduce the possibility of burrs. Then, with computed tomography (CT), the designer will be able to detect burrs in a cross-sectional fashion, where they will determine the workpiece volume. Subsequently, they will be able to indicate the inspection areas or parameters with either 2D or 3D windows.

The main benefit of this method is that it can be taught automatically to the software offline by an operator. The coordinate measurement machine can generate the measurement sequence before creating the first workpiece. At this stage, the designer or operator can determine the allowances for the burr thickness. Usually, burrs that fall under the minimum thickness will not be considered.

Multi-Object Measuring and Detection during Production

CT measurements are made to workpieces manufactured in larger quantities during the production process. This methodology is more commonly used in the packaging industry, where mass amounts of packaging such as food lids and pots and plastic boxes for medical, cosmetic or healthcare products are inspected and measured. The measurement process is automated and reduced to a short period of a few seconds for each piece. One huge benefit of this method is the ability to refer to the display of the 3D CAD fixture model, where the software can determine and assign workpieces depending on whether they are out of tolerance.

Visual Inspection and Assessment

One of the other ways you can detect burrs in your workpieces is through a visual assessment by the software, where analysis markers can set flags that contain alphanumeric data and connotations. In addition, this computer vision (CV) software or technology should be able to determine the size of the burrs within specified intervals through SEM (scanning electron microscopy) images. Through this, you can examine the deviations in the burr tolerances.

Work with Willrich Precision

Willrich Precision has more than four decades of experience in the inspection, metrology, and gaging field. It offers customers a wide range of services and products, including sophisticated metrology technology and measuring tools in vision and laser systems. Moreover, we take immense pride in establishing ourselves as a leader in measurement instrumentation technology and, therefore can cater to a wide range of clients from different industries. We prioritize every relationship with every client. That is why we provide you with a free consultation and access to our team of experienced staff, who are highly skilled and can provide you with the assistance you require.

For more information about our range of inspection and metrology services and products, please contact us at [email protected] today!

How Can Structured Light 3D Analysis Help Glass Bottle Mold Manufacturers?

Glass bottle molding often features complex artistic designs and intricate details. This causes inefficiencies during the manufacturing as blanks and molds would need to be altered frequently to fit the customers’ requirements, especially those with various compounds angles. In many cases, the only way manufacturers could address this issue is by modifying their equipment to reproduce the copy. As a result, this has caused production costs to increase significantly and has led many companies to innovate using Structured Light 3D Analysis to expedite the mold modifying process efficiently.

What is Structured Light 3D Analysis? 

Structured Light 3D Analysis is an efficient and fast way to capture the topography and metrology through modulating and specific patterns of light while also using a 2D imaging camera. It is a reliable and well-established technology used by many manufacturing and engineering industries. It allows the intricate surface geometries of objects to be accurately captured at a high resolution. 

Structured Light 3D Analysis is often non-contact and done optically. As a result, it can be utilized in various applications due to its thermal and mechanical stability. For instance, the Hexagon Metrology Structured Light Scanning Technology is a two-camera system and is known for its precision and versatility to overcome modern metrological challenges. 

It is able to efficiently translate measurement information data obtained from its analysis into accurate digital mesh data, which is ideal for reverse engineering applications. 

How does Structured Light 3D Analysis help Bottle Mold Manufacturing? 

Structured Light 3D Analysis is a viable solution for many bottle mold manufacturers as it efficiently expedites the reverse engineering and production process. In many cases, manufacturers will need Structured Light 3D Analysis to generate reliable and efficient machine paths. In addition, many designs used on bottle molds are artistic, intricate, and will require technology that can accurately capture the product’s highly detailed typography and metrology. 

The system will capture a mold, generate a high-quality 3D digital replica, and import the digital mesh data into a third-party application. The Hexagon Metrology Structured Light 3D Analysis helps manufacturers create a G-code from the STL file format, enabling hybrid machining and cutting down inefficiencies. Therefore, this has helped reduce production and reverse engineering cycle times by up to 50%, as it can scan the high definition and crisp edges of any design used in the mold. 

Why Choose Willrich Precision Instrument? 

With more than 45 years of experience under our belt in the field of inspection, metrology, and gaging, Willrich Precision Instrument offers our customers a wide range of products spanning from basic measuring tools to sophisticated metrology technology such as micrometers, vision systems, and laser systems. In addition to having a high-quality line of precision instruments, we take immense pride in successfully establishing ourselves as a leader in measurement instrumentation technology. Furthermore, we value the relationship we have with every client. That is why we offer our clients free access to our team of professional and experienced staff, who can provide useful and reliable implementation and selection assistance. 

For more information about our range of Structured Light 3D Analysis products, feel free to call us at 866 – WILLRICH (945-5742) or send an email to [email protected]

Top Tips To Read A Dial Bore Gage

A dial bore gage is an instrument that measures the inner diameter of small holes. Bore gages are critical when it comes to measuring parts that have small holes in them. Typically, these versatile instruments are used as part of a quality control process to ensure that bore sizes are standardized. The dial bore gage is usually calibrated in 0.001 inches and consists of a shaft with a dial indicator situated at the top. The instrument also has an actuating plunger and the readings that it gives are usually compared to standardized measurements for analysis.

How They Work

Dial bore gages have a contact needle that lies in the head of the dial gage. When the instrument is moved (such as when taking measurements), the needle moves and transfers data to the readout or dial. Dial bore gages also have an interchangeable end that helps to set the nominal size. Dial gage operators have to set the gage to its nominal value before commencing any measurements. Here then are some tips on how to read a dial bore gage when taking measurements of a bore or cylinder.

How to Take Accurate Measurements

When taking measurements, you start by placing the bore gage in the micrometer and rotate the dial till the pointer is aligned to the zero marking on the dial face. One then places the dial gauge in the hole or cylinder being measured. One must take special care to ensure that the anvils on the instruments touch the sides of the hole or cylinder. Once this is done, the instrument operator then rocks the gage back and forth ensuring that the anvils do not lose contact with the walls of the cylinder. When this is done, the pointer will swing counterclockwise or clockwise. After a while, the pointer will start to move in the opposite direction toward zero. The machinist then records the precise measurement when the pointer starts heading towards zero.

Calculating the Measurements

This is done by simply taking the measurement at the point when the needle started to reverse itself and subtracting (or adding) the measurement the instrument is calibrated to. For example, let us assume that the instrument was calibrated to 2 inches and the instrument needle changed direction at 0.007 clockwise. The measurement of the bore in question would thus be 2.007. This is because when the needle moves clockwise, you add the two numbers. Alternatively, if it had moved anti-clockwise, we would have subtracted 0.007 from 2 inches to give us 1.993.

Advantages of Dial Bore Gages

Dial bore gages are popular with quality control operators because they are highly portable and easy to use. They also have very few moving parts and thus far less prone to breaking down than most other precision instruments. Dial bore gages also do not require sophisticated knowledge of instruments and therefore can be handled by line workers on the shop floor without much prior training.

For the best in precision instruments, get in touch with Willrich Precision. We have over 45 years of experience in delivering gaging and metrology type products to customers all over the United States.

Product Spotlight: Starrett MVR Manual Video Measuring Machine

Starrett video measuring machines allow for accurate and quick 3D measurements of small parts. These parts are typically inspected during quality control processes in manufacturing plants. In some cases, these types of measurements are taken offline to reduce environmental variables. Today, professionals can find two types of video measurement systems: automatic and manual. It is important to note that video measuring machines do not directly measure the parts but instead measure various images of a part. This machine is designed to develop a precise reproduction of the part via state-of-art optics and lighting systems

When a part is measured by a manual video measuring machine, it is moved on a manually operated workstage. The Z-axis zoom lens, however, can be motorized should the operator find it more convenient to do so. The chosen metrology software then automatically detects the part’s edges and guides the user to move the stage accordingly. No part of the video measuring system should move independently and that’s why a steel or granite base is needed to maintain overall equipment stability.

Willrich Precision is an authorized dealer of Starrett precision measurement instruments. If you are looking to get a Starrett MVR Manual Video Measuring Machine please contact us to arrange as demonstration.

About Starrett

Laroy S. Starrett founded the L.S. Starrett Company. Since their inception in 1880, the company has been manufacturing precision tools, gages, measuring instruments, and saw blades for a wide range of consumer, professional, and industrial markets across the globe. Today, there are over 5,000 different types of products to choose from. Starrett is recognized for their unrivaled standards for fine precision tools for over 130 years. This has allowed the company to be known as the World’s Greatest Toolmakers.

Features of the Starrett MVR Manual Video Measuring Machine

Here’s a quick look at some notable features of StarrettMVR Manual Video Measuring achine:

  • Comes with a granite base
  • Ring light LED surface illumination
  • Collimated LED sub-stage illumination
  • Features a color digital video camera
  • Video edge detection (VED) capabilities
  • Field-of-view (FOV) measurements (can be integrated with stage motion)
  • Compatible with MetLogix M3 metrology software
  • Motorized Z-axis positioning with variable speed controls
  • Manual X-Y positioning via hand heels
  • X and Y accuracy of 3.5µm + 5L/1000
  • Z accuracy of 2.5µm + 5L/1000
  • Requires at least a Windows 7 Professional operating system to enable network connectivity

Get Starrett MVR Manual Video Measuring Machines from Willrich Precision!

Willrich Precision offers Starrett MVR manual video measuring machines at the most competitive rates. Our company has been in business for more than 45 years and provides top-notch products in the gaging, inspection and metrology industries. We are also ISO:9001:2008 Registered and can provide professional calibration and repair services. Enjoy complete peace of mind knowing that our stellar measurement products and gages can cater to the diverse inspection needs of automotive companies, the military, aerospace companies, and much more.

To know more about our Starrett MVR Manual Video Measuring Machines and the benefits that they provide, do not hesitate to contact us today.

Understanding The Practicality Of Hardness Tests In Materials Production Processes

You may have heard of hardness tests in quality control processes. Hardness tests can tell quality control officers a lot about a product. It offers insights into the flexibility, strength as well as the durability of a product. Hardness tests are performed on all types of products including raw materials and finished products. Hardness testing is easy to perform and is usually non-destructive. The test does not require major alteration to the product and advancements in technology mean that modern instruments give highly accurate readings.

How Hardness Testing Has Changed

In previous years, scratch tests were conducted to determine the hardness of a part. The testing was based on an object that had increasing hardness from one point to another. Testing was done by having the part being tested scratch various points of the bar. The level at which the part could produce a scratch on the object determined its hardness. As industries progressed, quality control officers began to use diamonds and even steel balls to determine how hard an object was. Regardless of which method, these approaches were slow and were not suited for the high-pressure demands of modern industries. For this reason, more refined instruments were developed to measure the hardness of a product.

Modern Methods of Hardness Testing

There are a variety of hardness testing approaches today. Some of these include the Rockwell Method as well as the Knoop approach. Rockwell works best with metals and alloys and is favored for the quick results that it produces. On the other hand, the Knoop approach works best for thin materials and coatings. Some hardness measuring instruments can give results very quickly and are highly portable. Modern hardness instruments leave an indentation that is so tiny that it is almost unnoticeable or does not affect the functionality of the product. For instruments that leave a much larger indentation, the indentation mark can always be sanded out so that it is not noticeable at all.

How Hardness Tests are Done

Various tests use different approaches to measure hardness. For example, the Rockwell hardness test process relies on making a small indent on the part being measured by applying a relatively small load on the indenter. This helps to establish the zero-datum position. Once this is done, a bigger indentation is made using a larger load. The difference between the first indentation (depth) and the second helps to establish the required reading. Typically, the process makes use of a diamond cone for testing metals and tungsten is used to test softer materials.

Importance of Hardness Testing

Tests done on the hardness of a material helps to determine the structural integrity of a product. This, in turn, helps manufacturers know whether the product will perform as expected in the market. We can thus say that hardness tests help consumers to use products safely and for long by helping eliminate those that are structurally unsound.

For the best in precision instruments, get in touch with Willrich Precision. We have over 45 years of experience in delivering hardness testers to customers all over the United States.

In The Limelight: Ra Measurements

Ra is a unit of measurement that is used to express the average roughness of a surface finish. Ra is especially useful because it shows the average deviation that a surface has in comparison to a mean line. However, Ra works great for general applications but faces some limitations when it comes to very specific measurements.

It also might be inadequate for machinists and quality control experts who deal with sensitive equipment. This is because any slight deviation on the surface finish can affect the performance of a part in a significant way.

Understanding How Ra Works

One of the things a machinist must understand is the relationship between the average roughness and the surface finish in general. Surfaces with varying profiles can still have a similar Ra value but the different profiles mean that these parts work differently.

For example, if a part has scratches on its surface, there is a risk that is might fracture prematurely. This calls upon machinist to ensure that they consider the surface features relative to the functionality of the part.

A More Efficient Approach

Sometimes, machinists and quality control officers recommend very tight Ra parameters in order to try and guard against scratches and peaks. This leads to a lot of wastage and is not a very efficient way of dealing with such issues.

Engineers who understand the relationship between Ra values and the surface finishes know that it is easier to clear off the peaks rather than try to use high-tolerance Ra specifications. This approach allows them to achieve the same results but in a far more economical and competitive way.

While this may sound abstract, the ability to do this makes all the difference when it comes to competitive bidding. This is because the former is able to present more competitive bids while achieving the same exact quality specifications.

Getting the Right Average Roughness

When you are machining a part, it is critical to remember that different machining processes produce different kinds of tool patterns. A good example is the roughness that comes from grinding. This is generally of a shorter wavelength as compared to turning. When a part surface undergoes milling, there are even longer wavelength patterns. Sing point boring generally produces the longest wavelength patterns.

Keep in mind that the wavelength we are talking about is the spacing between individual toolmarks and not how wavy the surface of the part is. When taking the Ra values of a surface, care must be taken to ensure that the measurement is not affected by the waviness. This is done by making sure that the cut off length is short enough. At the same time, it must not be too short otherwise only a part of the tool mark is measured. Ideally, use a cutoff length that can include five complete sets of toolmarks.

Need An Excellent Mobile Roughness Tester? Try MarSurf PS 10!

With many manufacturing processes, there is always an emphasis on the quality of a product or part surface. For some products or parts, the surface finish determines how well the part functions. For example, too much roughness on a surface might weaken a part by making it more likely to crack and fail. This is especially true for parts that are subject to contact and thus friction.

Measuring Surface Roughness

The need for accurate measurements when it comes to surface roughness means that that quality control must have the right tools for the job. Not only must these products be very accurate but they must also be able to give quick results. This is because in a production setting, delays in the production line can mean loss of revenue for the organization. Sometimes the parts being measures are too heavy so they can’t be moved to the quality control room. In such cases, it becomes critical to be able to have the measurement instrument on the production floor. This reduces the time spent checking parts and thus saves the business money.

Introducing the MarSurf PS 10

The MarSurf PS 10 mobile roughness tester is one of the best in this category. The MarSurf PS 10 features state-of-the-art features such as a smartphone display that allows for easy use. The roughness tester also has internal memory for data storage but also the capacity to connect to a computer for the transfer of data. Its rechargeable data source allows for around 500 measurements and which increases its mobility. Its small size makes it very portable and very handy in a factory environment.

Other Features of the MarSurf PS 10

            •           Features a clear and adjustable display

            •           Data can be stored as TXT, CSV, X3P or PDF

            •           PDF documents can be created in the instrument

            •           Can undertake 1200 and above measurements between recharge

            •           Features a detachable drive unite

            •           Features the same number of functionalities as laboratory equipment.

            •           Has a favorites function that allows you quick access to commonly used functions

            •           Easy to use thanks to the automatic cutoff selection feature

Top Mistakes To Avoid When Using Thread Gauges

thread gauges

Thread gauges are used for a wide variety of industrial operations and can be considered as equipment that is essential. As an owner of a thread gage, it is important to note that maintenance is necessary in prolonging its lifespan and productivity. However, it is very common for serious mistakes to be made when using this type of gage that can affect the efficiency and condition of the equipment. Ensuring that you avoid these mistakes can help you to prevent any malfunctions of your thread gage. Here at Willrich Precision Instruments, we provide a wide variety of different precision instruments that are made with the finest materials and guaranteed to withstand the test of time.

Exposure to Temperature Extremes when Storing Your Thread Gauges

Obviously, as a precision instrument, the most important thing to maintain in a thread gage is its precision. These gauges are made using metals that can be sensitive to temperature and can either expand or contract depending on the extremes. This change in size of the thread gage can compromise the precision of the thread gage. Thus, you should only store your gauges in a storage area that is not affected by the extreme temperatures as the result of the climate. Additionally, make your best effort to store your gauges in a place where there is as little humidity as possible in order to prevent rust from ruining the quality of its performance.

Allowing Your Thread Gauges to Become Dirty

The dirt that gets trapped in between the parts of your thread gage can negatively affect its functionality and can decrease the precision of the instrument. Therefore, it makes sense to schedule regular cleaning of your thread gage so that proper maintenance of the parts is carried out. Additionally, in the industrial environment, workers’ hands can become contaminated with oil or other substances that can affect the performance of the gauges as well. As such, thread gage operators should be trained to clean their hands before touching the gauges so as to prolong the life and increase the efficiency.

Failing to Lubricate Your Thread Gauges Adequately

Lubricating your thread gage is essential in preventing any corrosion of the parts. This also ensures that the entire system works seamlessly. What you can use for lubricating your thread gage includes oil-based easy-peel wax coatings.

Not Keeping Track of the Accuracy of Your Thread Gauges

It is inevitable and only natural that your gauges become less accurate over time. This would require you to regularly recalibrate the thread gage and document the changes of its accuracy. Ensure that the dates which you carry out the recalibration are documented properly and that the schedule is in line with the recommendations of the manufacturer.

Not Training Your Thread Gage Operators

The easiest way to make sure that your thread gauges are treated and used in the right way is to give your employees who operate the thread gauges proper training. The training should encompass how to use the equipment and also how to engage in proper maintenance so that it can stay efficient for years to come.

Whenever you have new employees, it is always wise to give them proper training as to what the right storage methods and maintenance procedures are. Be sure to hand out manufacturer manuals so that they can learn how to avoid malfunctions and engage in proper safety procedures as well.

Things You Need To Know Before Choosing An Ultrasonic Thickness Gage

ultrasonic thickness gage

Before you choose your ultrasonic thickness gage, you have to consider a number of factors. Some of the obvious factors include your budget constraints and also the reason you are buying it for. However, if this is your first-time purchasing equipment like this, then you might not be familiar with some of the other factors which might not be as obvious. It is important to note that these factors might be equally worth considering when choosing an ultrasonic thickness gage from such a competitive market. Furthermore, there are many factors that you need to consider when talking about the application of the instrument.

Before choosing the one that you want to get, you should find out exactly what you can and cannot do. Here at Willrich Precision Instrument, we provide a wide range of metrological products for any of your industrial needs.

Ultrasonic Thickness Gages Explained

Ultrasonic testing to measure thickness is becoming a very popular method. The main reason for using this device is that it can test the thickness of a wall without any form of destruction. It is usually used for the detection of thinning walls as a result of corrosion or as a method used for quality assurance. It can also be used for measuring boilers, aircraft materials, and even pipes.

The market for ultrasonic thickness gages is extremely competitive and there are many different manufacturers. The entry-level handheld units might cost as low as a few hundred dollars and can reach up to thousands of dollars. Usually, the software used for such products are very similar, but manufacturers can alter the internal software to cater to more specific needs. Many companies around the world offer the option to upgrade their products. As a result, a simple thickness gage can be upgraded to a device with datalogging capabilities and live waveform features.

The Material of Your Ultrasonic Thickness Gage

It is essential that you also list out the materials and the range of thickness for each material that you might want to test. Additionally, you should note down the accuracy that you want to achieve, the temperature when you are taking the readings, and the finish of the materials. In the case where a fluid can be applied to it, the fluid is most likely soluble in water and suitable for use with high frequency sound waves.

Considering the Weight and Size

When contemplating which model to purchase, some factors that you should consider include the weight and size of the ultrasonic thickness gage. Firstly, you must check if you have sufficient storage space for the size that you are looking for. Some ultrasonic thickness gages are compact and portable. They can even fit inside your pocket because they utilize AA size alkaline batteries that everyone knows are extremely portable.

On the other end of the spectrum, there are much larger gages because of the battery that they use. For example, if you need long-lasting battery life that uses latest lithium ion technology, then chances are your unit will be much larger. Additionally, you should consider how easy it is to service the unit that you want to buy, bearing in mind the place of manufacture and their reputation in this industry.