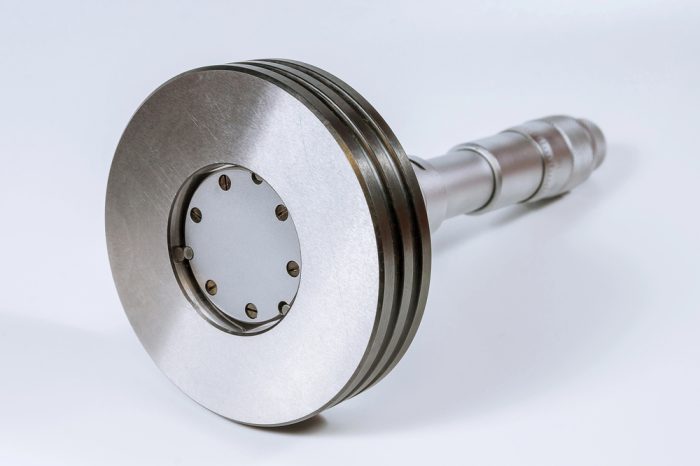
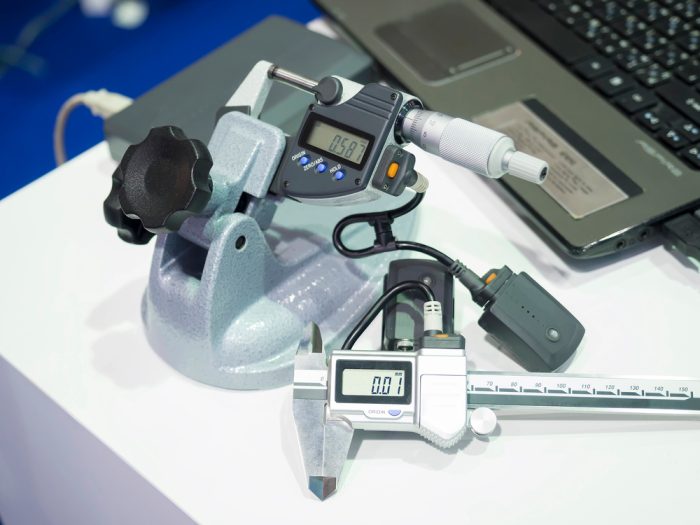
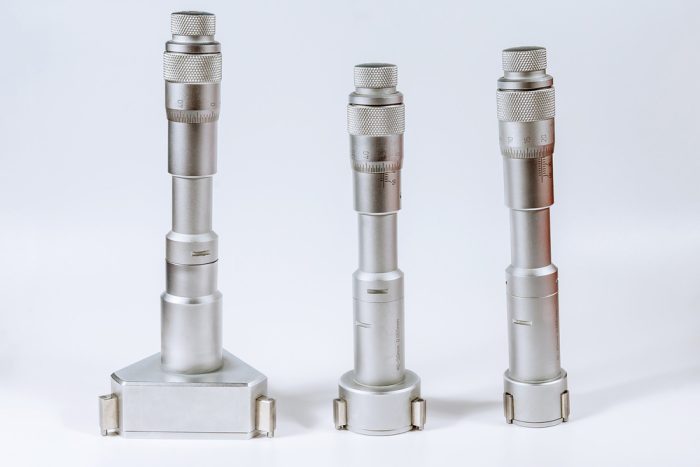
Top Tips To Check For Balance And Centralization Problems

One of the advantages of using air gages is that there is little contact between the tool and the workpiece. In fact, such tools are typically referred to as non-contact tools. But, strictly speaking, this is not entirely true. Air gage tools do come into contact with workpieces, and this may be reflected in the fact that they do suffer wear and tear over time. The progress of this degradation may be significantly slower than that of contact gages but eventually, it is bound to happen.

How Wear And Tear Leads To Centralization Issues

When your air gage tool is sufficiently worn out, the clearance between the workpiece and the gage will usually be greater than it was designed to be. This in turn leads to centralization problems where the air gage tools measure a chord of the workpiece in question rather than measure the diameter of the part. Centralization problems may also arise if the centerline of the jet is not aligned with the plug centerline. As the tool degrades and the space between the bore centerline and the chord increases, the centralization errors become bigger and bigger.

Obviously, machine operators will allow for some centralization error, but this depends on how much leeway their process allows them to. With looser tolerances, these kinds of errors don’t pose much of a problem. However, with tight and precise machining, this becomes a problem for the machine operator.

Understanding Balance Errors

Unlike centralization errors, balance errors happen when the orifices and cavities in the air gage jets become clogged or are damaged by misuse, or as we saw earlier, become worn-out unevenly. This is because for your air gage to work properly, it is important for all the jets to have the same orifice diameter and recess. Anything that changes these parameters throws your air gage tool off-track.

The next question then is how you can spot this wear and tear and what you can do about it. There are two main approaches that you can use to do this.

Visual Inspection

Though not always possible, you may be able to see contaminants that may be clogging up your jets. This will of course depend on the type of tool you are using, its size and so on. This is part of the reason it is essential to keep your gages as clean as possible, as well as the workspace that you use them in. However, visual inspection may not always be possible. Even in the circumstances that it is, it may not always be possible to understand just how badly the problem is affecting your measurements.

In order to get a more accurate picture of the problem, try the second approach.

Using A Master

This approach is based on the fact that for most air gage tools, wear and tear tend to follow a fairly predictable pattern. With gages that are hand-held, the wear is often around the plug’s circumference and tends to be relatively even. For these, secure the gage horizontally, then take a master reading. Having noted the reading, take the master and place it on the lower surface of the plug. Again, take another reading. If there is wear and tear of the plug, the readings will be different. Generally speaking, if the difference between the two is more than 10% above the acceptable tolerance, you may have to replace the plugs, or the tool all together.

How Do Air Straightness Plugs Work?

Air straightness plugs are slightly more sophisticated than conventional air plugs, but still have all of the benefits of a normal air plug: they are simple to set up and operate, and they produce highly accurate results.

Design

A conventional air plug includes four measurement jets, two in the center and two at the ends, arranged in two groups. The plug’s structure enables it to see both ends of the bow situation. The exact location of the jets in relation to one other is not governed by any standards, as is the situation with squareness or taper tests. There are no ratios concerned, either.

The air nozzles at the plug’s extremes are designed to check for non-straightness, which is normally defined for the bore‘s whole length. However, before we can grasp the way in which a straightness plug functions, we must first look at the different combinations of jets that are common in air tooling.

Differential Measuring

A differential measurement system is what is associated with a two-jet plug. Picture a two-jet gas plug with a zero readout within a master ring. Adjust the plug such that one of the jets is positioned on the ring’s side. This raises posterior force on one jet while lowering it for the other.

A four-jet system is an expansion of the two-jet gas plug. Four jets are combined together in this case, and in the event that the plug is shifted in any manner, an aggregate reading is taken once again. The four jets each detect four changes in pressure and sum them up. The total—and the readout on the indicator—changes whenever any of the recorded dimensions fluctuates.

On the plug, the 4 jets are usually at equivalent levels or planes. The 4 jets may theoretically be moved individually anyplace along the plug, and in the event that they are situated at ninety degrees relative to each other, they would measure the bore’s mean diameter. The 2 jets on top are counterbalanced by the 2 jets on the bottom, resulting in no change in the show. The aggregate pressure fluctuates if the bore is not completely straight, and the differential would be displayed on the instrument.

Dynamic Measuring

The display gives a number in the event that the straightness plug is merely put into the bore. The key question is what that figure implies. Whenever the jets are aligned with the bow, according to the orientation, they obtain their maximum or minimum reading. When the plug is rotated one hundred and eighty degrees, the outer and inner jets switch roles and show the same value, indicating that the plug is in a differential state.

However, when the plug rotates one hundred and eighty degrees to explore the bore, the sets of jets would have a peak clearance, followed by a minimum clearance, generally at ninety-degree angles to one another. As viewed along the whole extent of the plug measuring length, the difference between the greatest and minimum value would be the out-of-straightness state.

Why Concentricity Measurement Is Important In Manufacturing

In manufacturing, the design of each component contributes to and determines the usefulness and effectiveness of the end product. If concentricity is not measured and remedied before the product is sent into manufacturing, it could create a chain reaction that will cause serious issues later down in the assembly pipeline. This is highly cost-ineffective as it would incur high costs for your project. Therefore, concentricity must be measured and ensured of the right value. In addition, all the parts should work cohesively together before the product design is sent into production.

What Is Concentricity?

Concentricity is considered a type of complex tolerance, and its value is calculated to determine to which extent the geometric shape would be closest to the ideal form. First, median points of the spherical and cylindrical parts are established. Then, when the piece is concentric, the thickness of the internal and external walls will be consistent and equidistant. This would be critical in ensuring that the dimensions of the finished products will not exceed the manufacturing tolerances, which helps in fitting parts accurately in their intended application and will prevent any unintended vibratory movement and resistance.

What To Choose: Concentricity or Total Runout?

Concentricity is measured or calculated using a process also known as total runout. The two types of measurements are similar, but they vary in specific components. Both are determined using an axial orientation or alignment and also pose the challenge of being difficult to calculate. The median points are established in a spherical and circular axis in calculating concentricity. At the same time, the total runout is determined by fixating a datum point and then turning the part around to ensure median points fit within the tolerance zone.  

How Is Concentricity Usually Measured?

There are three ways concentricity is usually measured to ensure minimal error in the manufacturing process. The first is using a sample drawing to map out the axes of the cylindrical or spherical shape, and the aim is to ensure the median points are accurate coaxially. The next most commonly used method is using an equipment called the dial gage.

The dial gauge is placed on the circumference’s vertex of the product, where the axis of the tolerance would be determined. Then, the product would be rotated, the maximum and minimum runout values would be calculated, and the specified circumference would be measured. This difference in maximum and minimum values would be considered concentricity.

The last way concentricity is measured would be through a coordinate measuring machine, where the circle of the plane is calculated instead of coaxially. Then, the stylus is placed at the datum circle’s measurement point and the target circle’s measurement point, where the concentricity is measured.

Why Choose Willrich Precision?

Willrich Precision offers over four decades of inspection, metrology, and gauging experience. We  provide a vast range of services and products to clients, including advanced metrology technology and measurement equipment for vision and laser systems. Furthermore, we take great satisfaction in establishing ourselves as a pioneer in measuring instrumentation technology and, as a result, can serve a diverse spectrum of clients from various sectors. Every client connection is given top priority. That is why we offer you a free consultation and access to our team of seasoned professionals that are highly competent and can assist you.

Please contact us at [email protected] now for more information about our inspection and metrology services and products!

What’s The Difference Between Runout And Concentricity?

Concentricity limits how asymmetric the shaft will be in relation the datum axis. If the shaft is oval without being a perfect circle, it can still considered concentric. By imposing diametrical symmetry, it regulates mass balance about the datum axis. It does not influence the size or taper of the shaft. At the same axial location along the datum axis, it compares the radius on one side of the shaft to the radius on the other side of it.

Runout limits how the unbalanced circular or spherical shaft relates to each datum point located along the shaft. In the scenario where the shaft may be perfectly circular or round, if its axis deviates from the datum point, it will be considered a runout. However, the shaft size is not caused by the runout and runout has no control over the other forms, but only affects the variance of the radius-to-datum in each location.

How Similar Are the Results?

Position specifies the volume in which the shaft’s surface must remain. The shaft surface’s volume must remain in is determined by the shaft’s maximum permissible diameter alongside the tolerance of the position. The volume the axis must retain the tolerance of position and the maximum material tolerance allowed. The surface approach is the one to use. Any approach should produce relatively comparable results for an actual component, and they are also mathematically equivalent.

What Is the Difference between Runout and Concentricity?

Concentricity is the circular form of geometric dimensions and tolerance symmetry, while the runout combines both circularity and concentricity. The runout will equate to concentricity if the component is perfectly spherical and round. However, what is circularity in this text? Circularity would determine the form, orientation, and location and usually cannot be referenced to the datum axis. However, the only exception would be when the size tolerance is tighter than the runout tolerance.

Concentricity considers how a cylindrical shape is positioned on a theoretical axis. In contrast, the runout considers how the target deviates from the dimensions of a circle when it is perfectly positioned on the rotation axis. However, when the part is measured using a similar cross-sectional plane, this is considered a case of coaxiality, as the internal diameter and outer diameters of the shaft or tube are compared.

Why You Should Choose Willrich Precision

Willrich Precision has over four decades of experience in inspection, metrology, and gauging. Clients may choose from a wide range of services and products, including modern metrology technology and measuring equipment for vision and laser systems. Furthermore, we take great pride in establishing ourselves as a leader in measuring instrumentation technology, allowing us to service a wide range of clients from numerous industries. Every client connection is treated as our first priority. That is why we provide you with a free consultation and access to our team of highly qualified individuals that can assist you.

For more information about our inspection and metrology services and products, don’t hesitate to contact us at [email protected] today!

What Does Concentricity Mean?

Concentricity is a value used to calculate the extent to which a geometric shape in CNC (Computer Numerical Control) matching is closest to its ideal form. This measurement is commonly taken in CNC machining to ensure high precision and quality during the production stage to ensure manufactured parts fit perfectly together and minimize errors. There is value to measuring the concentricity of a product during CNC machining, including a greater assurance that the dimensions of prototypes will not exceed their manufacturing tolerances. In this article, we dive deeper into the meaning of concentricity and how it is used in metrology to expedite the product development pipeline.

Why Do We Need to Measure Concentricity?

The bottom line in the pursuit of product development is to ensure that workpieces do not vary too from having perfect symmetry, especially when a machine processes it. In many cases, deviation from having the ideal symmetrical balance can be costly, resulting in material waste and higher production costs. Most importantly, it will create flaws and issues later in the production process. Therefore, it is usually measured in an axial or radial orientation to examine the extent of the error in the different dimensions. However, as this process is considered complex and difficult to implement, it is only used in specific situations and when needed.

How to Measure Concentricity?

The value of concentricity is usually calculated using the two diameters of the hole – one for the hole and the other for the shaft. They signify the outer boundary and the inner line, respectively, and both are necessary to examine the deviation in surface measurements. Additionally, depending on the company’s protocols, they can be measured in imperial units (inches) or metric measuring (millimeters). As mentioned before, measurements in CNC machining are made in the axial or radial orientation; therefore, three methods are considered relevant in this aspect.

  1. Radial Error – The measurement variation between the feature’s center on one side and the corresponding point on the other.
  2. Axial Error – This is calculated by subtracting the distance from machine zero to a datum line and then calculating the deviation from this line at two locations along its length.
  3. Overall Accuracy – This value is obtained by adding radial and axial errors together, or it can be pre-calculated (empirically) because certain machines provide complete concentricity

A Common Challenge in Concentricity Measurement

The dial indicator is one of the most common ways in which engineers measure concentricity and it is usually done in both directions. It will measure at a 90-degree angle to the longitudinal axis and at a one-sided offset. However, it poses the challenge of requiring sufficient space of up to 18 inches to inset the spindle tip of the equipment. Additionally, you will need to be extremely cautious of any accidental breakage or deflection of the rotating components during the measurement process.

What We Offer

Here at Willrich Precision, we have almost half a century of experience in the metrology, gaging, and inspection fields. We offer a great variety of products such as basic measuring tools, metrological technology, and equipment like vision systems, laser systems, and micrometers. We are a pioneer in measurement instrumentation, and we are dedicated to helping you make informed and intelligent decisions for your business operations like CNC machining.

For more information about the product and services Willrich Precision Instrument offers, please do not hesitate to contact us today!

The Importance Of CMM Calibration Artifact In Metrology

Metrology is the scientific study of measurement and it ensures that the calibrated CMMs deliver precise and accurate results with provable validity. The purpose of metrology is to maintain measurement standards while developing new methods of measurement and ensuring that these methods are standardized and accepted around the world.

CMM calibration artifacts are important tools in metrology and have consistently been used to check for the quality of CMMs. Here are some reasons why they have been hugely important.

Ensures Accuracy

CMM calibration artifacts play an important role in metrology as they ascertain the measuring accuracy of the CMM. This ensures the performance and quality of the CMM and its ability to deliver precise and reliable measuring results.

This is done through the measurement process which assigns values to the property of an artifact and uses that as a benchmark for comparison against the measurement values of the CMM. The CMM calibration artifact thus helps to reduce or eliminate any bias and discrepancies in the measurement system of the CMM relative to the benchmark.

Verified and Traceable

Calibration artifacts, as the name suggests, have been calibrated. They are also traceable and all their measurements have been previously verified in the laboratory via a documented process, resulting in the calibrator’s drift errors being eliminated.

This makes them an excellent tool to calibrate CMMs and for their values to be used as a reference base to that of the CMM’s measurement values. This further eliminates any uncertainties or doubts about the precision of the measurements of the artifact.

Ensures Longer Life Span of CMM

CMM calibration artifacts also help to ensure a long instrument life span of the CMM. The CMM will wear down over time and much faster if used frequently. Rather than throwing away the CMM and replacing it every time it stops providing accurate measurements, you can use the calibration artifact to calibrate its measurements back to the correct levels. This is critical to the metrology and measurement precision of the CMM.

It also extends the life span of your CMM and prevents unnecessary expenditures while cutting costs. Moreover, the calibration artifact can also help you monitor the rate of degradation of the CMM and track other factors such as frequency of usage or environmental pressures that lead to faster wear and tear of the CMM.

Using this information, you can make the necessary adjustments to mitigate these factors and prevent extended wear and tear of the CMM. This ensures that your CMM is kept in a better condition for longer.

Increased Safety

Metrology ensures predictable performance from your measurement tools such as the CMM. Another way calibration artifacts are hugely important to metrology is because they help to increase the safety of CMMs through calibration, by ensuring the CMMs measurements are consistent and precise.

Minor inaccuracies may result in the CMM working incorrectly or false information about the safety of a certain product. Through regular calibration of the CMM via a calibration artifact, the CMM’s measurements will be more reliable and accurate, while also reducing unsafe situations.

Product Spotlight: What Is CMM Calibration Artifact?

A coordinate measuring machine (CMM) calibration artifact is used to ensure that the measurement data created by the CMM is accurate through regular calibration. The CMM calibration artifact also includes an ISO-17025 accredited certification and most CMM calibration can be accomplished through the use of a calibration artifact.

Importance of CMM Calibration Artifact

The CMM calibration artifact is an important tool that helps to gauge any inconsistencies or errors in the CMM measurements. This helps in providing accurate calibration data and in fixing or integrating any inconsistencies into the data. A CMM machine can have errors along 21 different measurement axes, thus depending on the severity of the errors, calibration may or may not be required more often.

Artifact Usage

The calibration artifact may be attached differently to the CMM depending on the type of calibration being done and the type of probe used. Some artifacts require a mounting bracket to be held in place for the calibration process while others can be mounted directly onto the CMM.

The calibration process involves measuring the artifact along with a fixed measurement plan and comparing the data points against the known dimensions of the artifact to check for consistency. By doing so, any error that prevents the CMM from accurately performing its function and measuring the inspected parts would be removed.

Different Artifact Types

Calibration artifacts help to measure the accuracy of measuring machines and this is done through the artifact containing a variety of geometry types such as spheres, cones, circles, and many more. Some common calibration artifacts include the ball plate, KOBA step gauge, end bar, hole plate, and swift-check gauge. Different artifacts may be chosen for the calibration of the CMM depending on the type of measurements being performed and the probe used.

Reminders when Using Calibration Artifact

When choosing a calibration artifact, it is best to choose an artifact that is similar in hardness to the material that is being measured. This is to prevent any inconsistencies due to material or probe deformation. Moreover, once the calibration artifact is installed in the CMM, it has to be given time to cool down and disperse its heat as the artifact is temperature sensitive and will react to the body heat transferred from the technician’s hands.

Sometimes when the CMM involves very precise measurements, the environment can also affect the calibration process. For example, differences in temperature or air currents in the lab can affect the calibration process. It is thus best to strictly control conditions when attempting to calibrate the CMM using an artifact to minimize any discrepancy.

Artifact Form and Material

The calibration artifact may differ in form and material depending on the kind of probe you are calibrating. The stiffness of the artifact material is also an important consideration when deciding which artifact to use as the contact force of the measuring probe may dent or deform the artifact. CMM calibration artifact forms also do not follow any specific rules due to the broad range of uses for CMMs.

Product Spotlight: 4 Models Of Universal Punch Concentricity Gage

Concentricity gages are utilized for inspecting the rotating parts’ exterior, internal, and flat surfaces. They also enable the co-axiality of more than two diameters to be measured and allow you to determine the runout of axial measurements. In short, they are designed to resolve inaccuracies in product dimensions and expedite manufacturing processes by providing accurate and reliable measurements. In the market, there are a wide variety of gages that are customized to meet unique and specific

Smart Spin Gage

The Smart Spin Gage is designed to measure the cylindrical components of the outer diameter and part edge runout in a short time (perpendicular to body diameter). The equipment incorporates a backstop that can be adjusted, roll clamping, and probe placement that can be orientated vertically and horizontally to handle a variety of component designs, geometric shapes, and sizes.

This product’s precision rotation and remote indicator RESET are enabled via an integrated STEPPER motor with specific drive control hardware and software. These specifications and features provide consistent outcomes with the correct setup for various component shapes and sizes within a given part size range. Additionally, component testing is available at two speeds – 10 and 20.

Universal Punch Concentricity Gage – Model A-10

The Universal Punch Concentricity Gage is a series of basic gage and standard carriers, comprising three major components – the gage model, main rollers, indicator, and accessories with this model. The concentricity gauges are classified into two types immediately, which are traceable to NIST. In this case, the accuracy of the standard black gage is assured to be =4um, while the precision of the gold gage is guaranteed to be =8um.

St. Mary Rotary “V” Block Gage

The accuracy of St. Mary Rotary “V” Block Gage speeds up the determining process of concentricity features, especially on cold-headed items. In addition, as compared to other comparable devices, it is much more simple and accurate. Geometric tolerances are necessary and required for cold-formed fasteners. This St Mary Rotary “V” Block Gage will be able to meet this need, being able to accommodate tight diameters.

Universal Punch Concentricity Gage Model H

Similar to Model A-10, the Universal Punch Concentricity Gage Model H consists of three main components – the gage model, main rollers, indicator, and other accessories. The part diameter and length capacity can be customized up to 1″ and 12″, respectively, while the gage length, width, and height are 12.5″, 5.5″, and 9″ approximately.

Work with Willrich Precision

With over four decades of experience inspecting, gaging, and metrology, Willrich Precision can confidently and effectively offer our customers a wide variety of products and services. We are equipped with the right equipment to support complex metrology measurements with sophisticated technology and measuring tools in laser and vision systems.

Taking pride in our role as a leader and supplier for measurement instrumentation technology, we have served a wide base of different clients from various industries. Our relationship with every client is unique, special, and valued – that’s why we offer a free consultation to allow you to speak to our team of expert, high-qualified service professionals who can provide you the help and assistance you need.

For more information about our range of services and products, please contact us at [email protected] today!

How To Measure Concentricity Tolerance

In the field of Geometric dimensioning and tolerancing (GD & T), concentricity is one type of complicated tolerance. It is usually used to establish the tolerance boundaries (otherwise called tolerance zone) where the median points of a spherical or cylindrical product design or feature are. It is often used for high precision components and when median points will need to be controlled. However, since measuring and verifying concentricity tolerance is a complex and time-consuming process, many engineers and product designers prefer and are usually advised to employ runout or position tolerance.

What Is the Tolerance Zone?

Establishing the tolerance zone before the manufacturing process is critical as this will determine the cost incurred and the success of your project. It is defined as the pre-determined horizontal length that extends from the outer edge wall to the opposite side. Concentricity establishes a 3-D cylindrical or spherical tolerance zone surrounding the datum axis, and all the central points will lie within the boundary. The diameter of this zone is considered the permissible and appropriate value for this callout.

When is Concentricity Tolerance Used?

Concentricity tolerance is complex and complicated; therefore, it is difficult to measure and calculate. It is usually used in transmission shafts, gear, or balancing equipment. This concentricity tolerance will determine the dimensions and size of the driving shaft to prevent any wobbling. First, the part’s real median axis must be determined to ensure concentricity by computing the midpoints of diametrically opposite locations. The median axis is obtained by connecting all such median sites. For the part to be approved in a standard engineering and designing process, all points on the median axis must be inside the cylindrical tolerance zone.

How is Concentricity Tolerance Measured?

The concentricity tolerance can be evaluated or measured in four basic steps. First, you will have to establish and identify where would the point of the datum plane, surface, or axis lies. Next, you will plot the points on the outer profile’s controlled surface, which can be determined using the CMM or a coordinate measuring machine. Then, you will have to measure and calculate where the central points and axis of the plotted profile are at different cross-sections. Lastly, you will need to verify where the positions of the central points within the cylindrical tolerance zone are.

Choose Willrich Precision

Willrich Precision has a well-established history of more than four decades in the fields of inspection, gauging, and metrology and carries a wide range of measuring tools, metrology equipment, and high precision instruments. We are considered by our clients as a pioneer in measurement instrumentation and are privileged to be able to serve a diverse range of clientele.

In our role as a frontrunner and provider of measurement instrumentation technology, we have served a wide range of clients from many industries. Our relationship with each client is exceptional, superior, and treasured – get in touch for a free consultation and speak to our team of highly-qualified service professionals who can provide you with the assistance you require.

For more information about our products and services, please feel free to contact us today!

How To Choose The Best CMM Calibration Artifact

Calibration artifacts are critical to the performance and quality of your CMM. They also help to ensure your measurement data are precise, accurate, and reliable. However, there are numerous calibration artifacts to calibrate different measurements.

Likewise, there are different types of CMMs and they can have errors anywhere along the 21 different measurement axes. Using the proper calibration artifact allows you to fix the corresponding measurement error and address any anomalies or discrepancies in the measurement data. Here are some tips to choose the best CMM calibration artifact.

Level of Precision

Before attempting to calibrate the CMM, you should first assess the level of precision required for the calibration. Is it simply to calibrate the faulty height measurements of the CMM? Is it to calibrate the probe angle of the CMM? Understanding the level of precision will give you a better analysis as to which calibration artifact to use.

This is because some calibration artifacts are better suited for high-level precision calibration while others are used for simple and daily calibration. For example, the swift check calibration artifact performs simple and quick checks on the CMM and delivers easy and clear results.

It consists of a length bar, ring gauge, and sphere that comprises all the geometries and directions required to check for the performance of the CMM. It helps to check for the daily measuring accuracy of every part of the CMM and has a standard precision level for calibration.

However, in cases where a higher level of precision is required in the calibration process, a laser interferometer is used. The laser interferometer is a calibration artifact that utilizes a laser with a beam splitter to make extremely precise measurements based on the reflected laser light.

Calibration Process

There are numerous CMM calibration processes and they require different calibration methods and artifacts depending on what you wish to measure. All calibration processes measure an artifact against a fixed measurement plan and the data points act as a reference base to be compared against the known dimensions of the artifact.

From there, the faulty measurements are rectified and the CMM is calibrated to remove any errors that would prevent it from accurate measurement. For example, if you wish to perform a coordinate calibration process or calibrate the height measurement of the CMM, you may choose a KOBA step gauge calibration artifact.

To perform a dimensional measurement calibration process, a rectangular gauge block would be used due to the vast selection of gauge blocks available.

Probe Material

The probe material is another important consideration in choosing the best CMM calibration artifact. When performing a CMM calibration, you want the artifact to be pretty similar in hardness to the material being measured.

This is because there will be contact force from the measuring probe to the artifact, thus if they are both similar in hardness, it will prevent any inconsistency or error in calibration results due to material or probe damage. Significant errors occur when the hardness of the material varies widely and this will affect the measuring accuracy of the CMM and the calibration process.

Benefits Of Using CMM Calibration Artifact

CMM calibration artifacts are important in ensuring the precision of CMMs and that they are working well within their specifications. This ensures the safety, quality, and innovation of CMMs and improves overall production and services.

If you look around your room or house, most of the items were produced within tight measurement specifications assured by calibration. CMMs are commonly used in various industries and through proper calibration using an artifact, their measurements will be more reliable and consistent. There are various benefits to using calibration artifacts and below are some of them.

Data Collection

Using a calibration artifact allows for data collection, generation, and analysis. To do so, the calibration artifact has to include sophisticated analog hardware, along with a microprocessor and software. This provides the calibration artifact with the internal comparison capability and references available to collect and track data at the time of calibration.

Measurement and tracking of any performance changes and drift relative to the internal references can likewise be stored for further analysis. This could come in very useful when a CMM that is reviewed once or twice every year goes out of calibration without the knowledge of the user. If critical tests and results rely on the CMM, this may have dangerous and costly consequences.

However, by using a calibration artifact with the necessary technology for data collection, external calibrations can be done alongside internal calibrations. Internal calibrations prevent the CMM from going out of calibration through the monitoring of the CMM performance between calibrations. This minimizes the chances of the CMM having to be constantly calibrated at the lab.

Data Analysis

Data from the calibration artifact can be stored and analyzed using statistical algorithms such as standard deviations. Artificial intelligence can also be used to analyze the given data to make better recommendations or simply list the important findings. Analysis of data is important as it allows the lab personnel to accurately pinpoint the cause of measurement errors in CMMs and how frequently they occur. This allows the user to better predict the performance of the CMM and take any necessary actions accordingly.

Versatile

Numerous calibration artifacts can be used for a variety of CMMs and different measurement axes. Different artifacts can also be used when there are different hardness or stiffness of the material to be measured in the CMM. For example, a swift-check gauge is a calibration artifact that comes equipped with a length bar, sphere, and calibrated ring gauge that incorporates all of the geometries and directions needed to check the performance of the CMM. It is versatile and can be used for small to medium-sized CMMs.

Confidence in Performance

Calibration artifacts give users confidence in the reliability and precision of their CMMs through checks and delivering results that are clear and easy. It further eliminates the cost and implications of a CMM being out of specification during use. Calibration artifacts ensure that CMMs provide better performance while fixing and minimizing any errors.

A Guide To CMM Calibration Artifact

A CMM calibration artifact helps to ensure the precision and accuracy of the measurement data from a CMM. This assures reliable results and benchmarks such as safety, quality, and equipment lifespan.

All CMM calibration artifacts adhere to the ISO 10360 series when performing calibration. Using calibration artifacts allows users to independently check and ascertain the measuring accuracy of the CMM as well as to detect any inconsistencies and correct them accordingly. It thus minimizes uncertainties and errors to an acceptable level.

How to Determine Calibration

A CMM can have errors along 21 different measurement axes. This means that a wide variety of calibration artifacts can be used to correct these errors and to ensure the accuracy of calibration data, which contributes to the fixing of these errors and their integration into the data system.

CMMs have different levels of calibrations which could range from weekly checks to checks once or twice every year. To effectively determine calibration, the error and inconsistencies in measurement data first have to be sieved out to determine which measurement axes are faulty. The corresponding calibration artifact can then be used to calibrate the measurement for that particular measurement axes.

Artifact Types

There are different types of CMM calibration artifacts used during the calibration process. This is due to the different measurements that can be calibrated in a CMM. Some common artifact types include the swift-check gauge, ball plate, ball and cone, end bar, length gauge blocks, and the KOBA step gauge. When choosing an artifact, it is important to choose one that has a similar hardness to the artifact being measured to prevent any probe and material damage.

Certain artifact types will be better suited for certain CMM calibration. Most CMMs require a custom artifact. For example, the KOBA step gauge consists of a one-dimensional test body with planned parallel measuring surfaces. It is best used with small volume CMMs such as multisensory systems and monitors height gauges.

Calibration Process

There are different calibration processes involved which require different methods and calibration artifacts depending on what you wish to measure. The calibration process involves measuring the artifact along with a fixed measurement plan.

This allows for a comparison of the data points against the known dimensions of the artifact and easier cross-checking in the event of any anomalies or inconsistencies in the data set. The result would be a calibration of the CMM that would remove all errors and allow the CMM to perform its function of accurate measurement.

Laser Interferometer

A laser interferometer is only used when a high level of calibration is required. It is also a calibration artifact and utilizes a laser with a beam splitter to make extremely precise measurements using the reflected laser light.

The interference pattern created by the reflected laser light is tracked and so are the CMM’s movements via computer software. Any anomalies or inconsistencies in the data set are likewise corrected. The laser interferometer requires a longer calibration time than other artifacts and should only be handled by an experienced technician.

Can Burrs Be Automatically Detected In Injection Molding Procedures?

Burrs are fairly common during the prototyping processes such as die-casting, injection molding, and machining. For instance, when two mold prototypes do not completely meld in the plastic injection molding process, burrs can usually occur due to inconsistencies and incompatibilities in injection parameters. As a result, this could result in consequences such as limiting the workpieces’ functionality and viability or blemishing the workpieces’ visual aesthetics.

In any case, the automatic detection of burrs has always posed a challenge to engineers and designers. This is especially problematic in plastic injection workpieces, where extra precautions have to be taken to reduce the formation of burrs. Therefore, many solutions integrate automatic detection targeted at specific parameters and work areas.

Detection in the Measuring Process

As the saying goes, prevention is better than cure. In most cases, it might be best to avoid the issue before it has even occurred – and this could start during the measuring sequence, where software is used in conjunction with the consideration of position deviations and forms to reduce the possibility of burrs. Then, with computed tomography (CT), the designer will be able to detect burrs in a cross-sectional fashion, where they will determine the workpiece volume. Subsequently, they will be able to indicate the inspection areas or parameters with either 2D or 3D windows.

The main benefit of this method is that it can be taught automatically to the software offline by an operator. The coordinate measurement machine can generate the measurement sequence before creating the first workpiece. At this stage, the designer or operator can determine the allowances for the burr thickness. Usually, burrs that fall under the minimum thickness will not be considered.

Multi-Object Measuring and Detection during Production

CT measurements are made to workpieces manufactured in larger quantities during the production process. This methodology is more commonly used in the packaging industry, where mass amounts of packaging such as food lids and pots and plastic boxes for medical, cosmetic or healthcare products are inspected and measured. The measurement process is automated and reduced to a short period of a few seconds for each piece. One huge benefit of this method is the ability to refer to the display of the 3D CAD fixture model, where the software can determine and assign workpieces depending on whether they are out of tolerance.

Visual Inspection and Assessment

One of the other ways you can detect burrs in your workpieces is through a visual assessment by the software, where analysis markers can set flags that contain alphanumeric data and connotations. In addition, this computer vision (CV) software or technology should be able to determine the size of the burrs within specified intervals through SEM (scanning electron microscopy) images. Through this, you can examine the deviations in the burr tolerances.

Work with Willrich Precision

Willrich Precision has more than four decades of experience in the inspection, metrology, and gaging field. It offers customers a wide range of services and products, including sophisticated metrology technology and measuring tools in vision and laser systems. Moreover, we take immense pride in establishing ourselves as a leader in measurement instrumentation technology and, therefore can cater to a wide range of clients from different industries. We prioritize every relationship with every client. That is why we provide you with a free consultation and access to our team of experienced staff, who are highly skilled and can provide you with the assistance you require.

For more information about our range of inspection and metrology services and products, please contact us at [email protected] today!

How Can Structured Light 3D Analysis Help Glass Bottle Mold Manufacturers?

Glass bottle molding often features complex artistic designs and intricate details. This causes inefficiencies during the manufacturing as blanks and molds would need to be altered frequently to fit the customers’ requirements, especially those with various compounds angles. In many cases, the only way manufacturers could address this issue is by modifying their equipment to reproduce the copy. As a result, this has caused production costs to increase significantly and has led many companies to innovate using Structured Light 3D Analysis to expedite the mold modifying process efficiently.

What is Structured Light 3D Analysis? 

Structured Light 3D Analysis is an efficient and fast way to capture the topography and metrology through modulating and specific patterns of light while also using a 2D imaging camera. It is a reliable and well-established technology used by many manufacturing and engineering industries. It allows the intricate surface geometries of objects to be accurately captured at a high resolution. 

Structured Light 3D Analysis is often non-contact and done optically. As a result, it can be utilized in various applications due to its thermal and mechanical stability. For instance, the Hexagon Metrology Structured Light Scanning Technology is a two-camera system and is known for its precision and versatility to overcome modern metrological challenges. 

It is able to efficiently translate measurement information data obtained from its analysis into accurate digital mesh data, which is ideal for reverse engineering applications. 

How does Structured Light 3D Analysis help Bottle Mold Manufacturing? 

Structured Light 3D Analysis is a viable solution for many bottle mold manufacturers as it efficiently expedites the reverse engineering and production process. In many cases, manufacturers will need Structured Light 3D Analysis to generate reliable and efficient machine paths. In addition, many designs used on bottle molds are artistic, intricate, and will require technology that can accurately capture the product’s highly detailed typography and metrology. 

The system will capture a mold, generate a high-quality 3D digital replica, and import the digital mesh data into a third-party application. The Hexagon Metrology Structured Light 3D Analysis helps manufacturers create a G-code from the STL file format, enabling hybrid machining and cutting down inefficiencies. Therefore, this has helped reduce production and reverse engineering cycle times by up to 50%, as it can scan the high definition and crisp edges of any design used in the mold. 

Why Choose Willrich Precision Instrument? 

With more than 45 years of experience under our belt in the field of inspection, metrology, and gaging, Willrich Precision Instrument offers our customers a wide range of products spanning from basic measuring tools to sophisticated metrology technology such as micrometers, vision systems, and laser systems. In addition to having a high-quality line of precision instruments, we take immense pride in successfully establishing ourselves as a leader in measurement instrumentation technology. Furthermore, we value the relationship we have with every client. That is why we offer our clients free access to our team of professional and experienced staff, who can provide useful and reliable implementation and selection assistance. 

For more information about our range of Structured Light 3D Analysis products, feel free to call us at 866 – WILLRICH (945-5742) or send an email to [email protected]

Top Tips To Read A Dial Bore Gage

A dial bore gage is an instrument that measures the inner diameter of small holes. Bore gages are critical when it comes to measuring parts that have small holes in them. Typically, these versatile instruments are used as part of a quality control process to ensure that bore sizes are standardized. The dial bore gage is usually calibrated in 0.001 inches and consists of a shaft with a dial indicator situated at the top. The instrument also has an actuating plunger and the readings that it gives are usually compared to standardized measurements for analysis.

How They Work

Dial bore gages have a contact needle that lies in the head of the dial gage. When the instrument is moved (such as when taking measurements), the needle moves and transfers data to the readout or dial. Dial bore gages also have an interchangeable end that helps to set the nominal size. Dial gage operators have to set the gage to its nominal value before commencing any measurements. Here then are some tips on how to read a dial bore gage when taking measurements of a bore or cylinder.

How to Take Accurate Measurements

When taking measurements, you start by placing the bore gage in the micrometer and rotate the dial till the pointer is aligned to the zero marking on the dial face. One then places the dial gauge in the hole or cylinder being measured. One must take special care to ensure that the anvils on the instruments touch the sides of the hole or cylinder. Once this is done, the instrument operator then rocks the gage back and forth ensuring that the anvils do not lose contact with the walls of the cylinder. When this is done, the pointer will swing counterclockwise or clockwise. After a while, the pointer will start to move in the opposite direction toward zero. The machinist then records the precise measurement when the pointer starts heading towards zero.

Calculating the Measurements

This is done by simply taking the measurement at the point when the needle started to reverse itself and subtracting (or adding) the measurement the instrument is calibrated to. For example, let us assume that the instrument was calibrated to 2 inches and the instrument needle changed direction at 0.007 clockwise. The measurement of the bore in question would thus be 2.007. This is because when the needle moves clockwise, you add the two numbers. Alternatively, if it had moved anti-clockwise, we would have subtracted 0.007 from 2 inches to give us 1.993.

Advantages of Dial Bore Gages

Dial bore gages are popular with quality control operators because they are highly portable and easy to use. They also have very few moving parts and thus far less prone to breaking down than most other precision instruments. Dial bore gages also do not require sophisticated knowledge of instruments and therefore can be handled by line workers on the shop floor without much prior training.

For the best in precision instruments, get in touch with Willrich Precision. We have over 45 years of experience in delivering gaging and metrology type products to customers all over the United States.